Friday, August 31, 2012

Triangle Fold Card Tutorial

I have been showing a lot of different folds over the past couple of months at my demos and have handed out over 200  tutorials in the last 8 weeks alone.

Now I am one of those people who forever looses things so I have decided over the next few weeks to upload as many of the tutorials as I can so we can all reference them whenever we need them.

I work to trend, in other words whatever is my trend at the time!!! Then I go off and start on something else and I forget about all the wonderful folds I have learned and used. Well no more........from now on I am going to try to recored ALL of them on the blog and then I will have a constant reminder of all the different things I have learned to do with paper and card so no ideas get lost.

 I decided to go with the Triangle fold card first. It's cute, fast to make once you have had a practice and as all the patterned decoration is done all you have to do is add the embellishments.


Ok, time to get going.........................

Cut a piece of 12” x `12” down to 11” x 11”.    Fold from corner to corner.

Along the fold from the left point make a mark at 3” and 5 ½ now do the same at the right side of the paper. Score all these marks.
Using a bone folder go over all these folds. You are folding them all inwards.

Normal Score Board: Now from the point of the triangle make a mark at 5” up each side of the point. Score from one mark to another.

Martha Stewart Scoreboard: Pop in the envelope triangle and place the paper as shown below (yes it is a different pattern!!!!!) Score down at the 3½" mark
 You will now have a little triangle between the scores where they cross over. Cut these out as shown below
 

This is what it should look like now.
On the left hand side fold inwards at the 5 ½ fold and the 3" fold
 

Bend back the 3” fold and pop your finger into the gap between the paper. Push your finger right to the bottom and you will make a type of cone shape.

Then press the cone downwards so that it flattens into a square.
 
 Aim for the top part of the diamond and then flatten out the end
 Now do the same to the right hand side of the paper.
 At this time you can decide if you want to join the two parts of the flap together or not. I always glue them together as I find it’s a neater finish.
 Bring both diamonds into the center
 Now tuck the flap into the front diamond.
 
I cover the diamonds with paper a little bit smaller then the actual diamond so it covers up the fold running down the center of it. I also make a panel in the center of the card for the greeting/message. Now embellish with loads of lovely things..

Here is another sample below using more of the Happy Days paper.
 

Now all you have to do is to make one. Off you go, I promise..........it'll be fun :)

Happy Crafting everyone.

Friday, August 24, 2012

Designer Die Cut Cards


Designer Die Cuts are fab fab fab. They help create such a lovely shape for a card or on a card. 

In the first two cards shown I have just glued the shape onto a card and cut around it and on the last card the shape of the designer sheet just sits perfectly on the card creating a great little background. On larger cards these die cuts can be integrated into your designs and create some fantastic looks and interest to the card, have a look at what the fantastic Designer Rebecca James has created using them in Belxey Black on her Docrafts Gallery here

I have used the Capsule Collection Lincoln Linen Designer Die Cuts on all the cards shown below but they come in some other fantastic colors like Bexley Black, Burleigh Blue, Parkstone Pink and Chelsea Green. The Happy Days and Portobello Road range also have some of these in their collections. Yum, I love all the names of these ranges.
Using an image, greeting and Paper from the Wellington Ultimate Decoupage and Die Cut Pack.

Using a Wellington Topper and a Capsule Lincoln Linen Big Bloomer Flower

Using the Capsule Collection Lincoln Linen Big Bloomer Flowers and a button from the Boofle button Pack
Well have a great day everyone and Happy Crafting :)

Wednesday, August 22, 2012

Tatty Teddy is Missing You

Just a quick card post today, Its been a busy week. Hannah is starting Secondary school in the next couple of weeks. She had her Induction day on Monday and now its the final run around time to get school shoes, calculators etc etc etc.......... and the list goes on!!!

Its also the week that the new Decrafts stock arrives so its frantic idea focus week to try to be ready to jump head first into new creations. All the Docrafts Designers are out there now with their brains working away on new ideas so it will be a busy few weeks for us all. I have two more demos this weekend in Newbridge Art and Hobby and Dundrum Art and Hobby showing the latest stock and then off I go on everything NEW NEW NEW. Yahoo.

So today I thought I would show you a quick and simple card using the Papermania Checkmates Embossing Folder and a Tatty Teddy Element Topper.

Nothing like an easy card to start your day :)
Happy Crafting Everyone :)

Monday, August 20, 2012

Pretty Wardrobe Card

Hi Everyone, today is the day that I felt like having a little bit of pretty on the blog. I made this card for demo and it got a great reaction from everyone, I have to say that its one I really really like.. The sides of the card have been scored at about 1/4 inch to add some height so the decoupage wouldn't get squished (hehehe... love that word!)

This card uses the decoupage, papers and a greeting from the fantastic Lucy Cromwell Ultimate pack, some bright pink card, 2 brads and voila a pretty card is born :)

 
Happy Crafting Everyone...... :)

Monday, August 13, 2012

Graduation Card Tutorial

I kept seeing Graduation cards all over the internet and for some reason no matter how hard I looked I couldn't find a tutorial on how to make one so .............I made it up myself........giggle. Its super easy to make and really gets a wow from the receiver. It can be done in white for weddings. Just embossed with the simple words of Wedding Invitation and it really is beautiful.  I have actually made this tutorial in white as I thought it would be easier for you to see in the photos.
So lets get going on making one :) All measurements are in inches.

Cut a piece of card stock to 8" x 8".
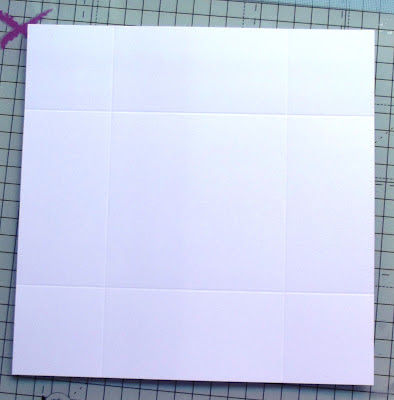
Score at 2" and 6", turn and score the next side at 2" and 6".

It should now look like this.
 
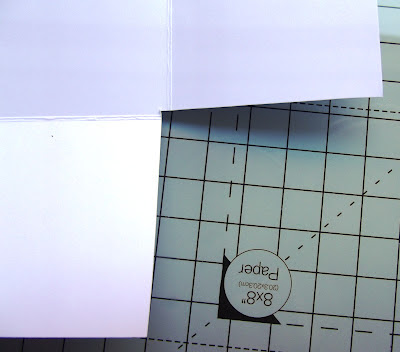
Now cut the four corner squares off. Make sure you cut out a little bit more then you usually would so that the card folds in neatly.
This will mean that the cuts will join up a fraction into the central square but don't worry this will be covered up later on. :)
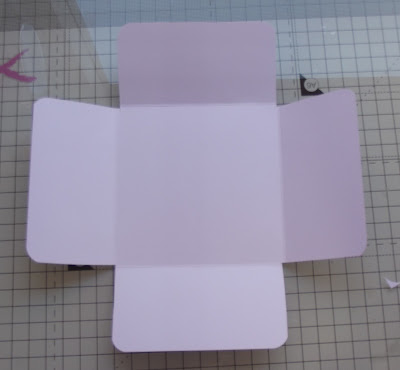
This is what you card will look like now.

Now take your corner punch and punch each corner.
Your card will now look like this :)
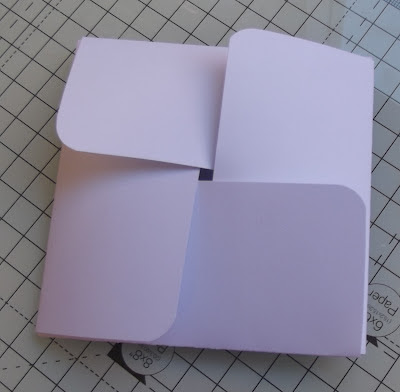
Follow the photos below to fold it all closed.


This is it closed up.
The photo below is not great but this is what it will look like on the other side. You will have little nicks showing at the corner but we will be placing a top onto this  and it will cover them up.

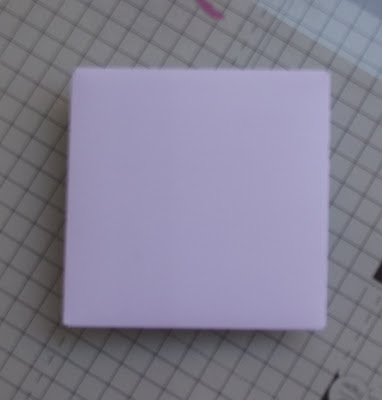
Cut a piece of card stock to the same size square as the card itself.
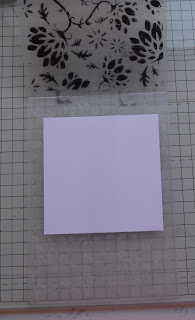
Emboss this piece of card on your Big Shot.

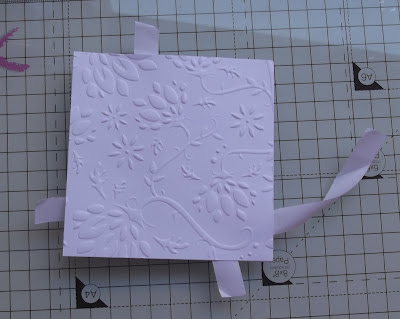
Place double sided tape on the back of the embossed piece and turn back the corners .
Join your embossed piece to the top of the card, when you are happy with your placement of the piece then press down on the exposed tape sections and slide out the tape cover pieces from the side of the card.
Now all you need to do is add a button and a tassel. If you have never made a tassle before there are a some great tutorials out on the web Make-a-Bookmark-Tassel is just one of them. Nice clear instructions. They use a needle on one of the steps and if I am honest I just wrapped my thread around a few times and knotted it and cut off any bits that looked a bit dodgy!!!! lol.

Remember this card can be made in loads of different sizes. All you really need is a square that can be worked into 3 sections. In other words a 12" x 12" piece of card gets scored at 3" and 9". What this essentially means is the center is twice the size of a side piece. In this case the left side piece will be 3" the middle will be 6" and the right side will be 3". For a 6" x 6" piece of card the left side piece will be 1½" the middle will be 3"and the right side will be 1½" . 

I hope you enjoy making this little gem of a card. I have to say I love it.

Happy Crafting Everyone.