Well I woke up this morning and felt so much better it was amazing, so in the spirt of feeling well and giddy before tomorrows demo I thought I would pop up a little tutorial for you all.
I just love little handmade toppers and whist researching a couple of months ago I came across these cute little pencils. I have searched everywhere since and I just can't find the original link so I thought I would do up a little tutorial for you all to follow. If you have been at my demos lately you may have seen me do this but its always good to have a reminder!
The card itself was made using Docrafts Kraft Cardstock (love that stuff). I used the Tim Holts letters for Teacher and some older Quickutz letters for the A+. The stamp is one that my big sis Janice brought me back from the states and the black is just a smooth black cardstock that I had hanging around.
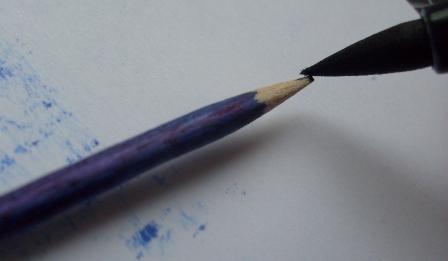
Pencil closeup.
Take a BBQ stick and place it on spare card as when the marker is wet it will leave marks behind.
Color the top part of the BBQ stick with a permanent marker leaving the tip untouched.
Color just the very tip of the BBQ stick with a dark grey marker, leaving a gap between the tip and the main body of the pencil.
Ta Da........... it already looks like a pencil.
Now to complete the job. Decide on the size of the pencil and cut off the excess with a wire cutters (not scissors as these would be blunted).
Color the end of the pencil with your marker. Leave to dry completely before you try to put this on your card so you don't damage your masterpiece!
Voila, your pencil is complete.
I use very strong double sided tape, silcone glue or a glue gun to stick the pencils in place.
This card below was made using Kraft Cardstock and the Pampered Pets cardstock letters from Docrafts, some smooth black card and just the apple from the stamp used above. The pencils on this small card were made with cocktail sticks.
Well go on now, give it a go. You will get very excited when you make your first one, just don't do what I did and make about 30 of them because I was so thrilled with them. They are hanging around all over the place now!!!


What a fab idea! Brilliant!
ReplyDeleteGreat idea...might have a go at this!
ReplyDeleteim aftr givn it a bsh- looks soosososooo fab!!!! genius
ReplyDelete