Friday, November 1, 2013

Halloween Coffin Invites


I absolutely meant to post these photos of Hannah's Halloween Party Invites yesterday (or at least in the last week!!!!) but I have been getting ready for the Knitting and Stitching Show in the RDS and its been a bit manic around here!!! These coffins are super easy to make as they are a template downloaded from the Martha Stewart website. I just popped onto google and searched for Martha Stewart Halloween Coffin template and there it was.at ..........FREE................yahoo.

Its a simple template that you print out, staple to black card, cut, score and glue. Martha even has a video up on the site showing you how to do it. I tied them closed with twine but before that I popped in a ticket invite which was again downloaded from the web. I put it in Word and wrote the text over it and printed them off. The skeletons that lie on top of the ticket were bought in the Euro Shop as a Halloween garland of 5 skeletons for €2.00.

They all really looked excellent and the kids there blown away with them. A great feeling to find you can impress 14 year olds.....lol.
 
 
Hannah dressed up as one of her favorite characters from the series of books she is reading at the moment and at the end of a fantastic party I managed to get a quick photo of her.......so here is a photo of my stunning daughter the Shadow Hunter.....

I hope you all had a great Halloween....................happy crafting everyone :)

Thursday, October 3, 2013

The Very Lazy Front Panel Card Tutorial


Look at me back to blogging after months off.!!! I decided to take the Summer off from the blog to catch up on family and home stuff and to just take a little break and I have to say I feel better for it :) I will still be blogging as much as I can but time is becoming a bit precious around here with Christmas on its way, school exams on the horizon , the big free workshops at the Bernardo's Charity Event  (12th October in the Tara Towers Hotel, Rock Road, Dublin) and 2 Card workshops at Inspiring Ideas in Blanchardstown (16th October and 13th November - See Demo 2013 listing on the right of the blog). I have had family and friends working away to help me get ready for everything so hopefully I can find some time to pop on  a couple of times in the next few weeks to put on another few posts :)

I have still been demoing throughout the Summer all over Ireland and I thought for my first post back after many months away I would show something close to my heart....................a lazy fold!!!

This is a front Panel card that many of you will have seen around the place but there tends to be a lot of measuring so I thought to myself  - "how can I make this the ............LAZY way.

For those of you who saw it in my demos you will appreciate how quickly you can do this and for those of you who haven't just give it a try. I can make the card (minus decoration of course) in less then 1 minute  - AWESOME :)

All you need is A4 card, a 12" ruler (any size), a light pencil and a craft knife. The ruler can be any size as the size of the ruler determines the size of the panels. Just pick the long ruler you normally work with and see what you produce. The size of the card can change depending on the size of card you want to make but to start off just go with using A4 size and play around with other sizes later.

So here it is:

THE VERY LAZY FRONT PANEL CARD TUTORIAL :)


Take an A4 piece of card and fold in half. Short side to short side.

 Place the bottom of the ruler to the bottom of the page (the open part not the fold. and draw a line across the page.
 Now turn your card sideways and place the bottom of your ruler to the bottom of the card. (the drawn line will be on your left hand side) Now using a craft knife cut from the drawn line to the folded spine
 This is how it will look when cut. Ensure you have cut through both pieces of the folded card.
Now turn your card so you are working on opposite side and do the same as before - place the bottom of your ruler to the bottom of the card and cut from the drawn line to the spine ensuring to cut through both pieces of the folded card. (the drawn line will be on your right hand side)
 It will now look like this after you have cut it.
 Turn the card again so the drawn line is close to you and place the bottom of your ruler to the bottom of the drawn line.
 On the left and the right thin panels draw a line
 It will look like this.
Score only the small lines on these 2 panels. Ignore the line in the middle panel. So you will score 2 small lines on the left thin panel and 2 on the right thin panel

 Fold in a mountain for the panels marked M and in a Valley for the panels marked V. Do this on both the front and back of the card.
 It will now look like this.
.
Rub out all your pencil marks and decorate.

Because you have used the width of your ruler you will find that all the panels (bar the middle back and front) are the same size making it much easier to just measure your ruler width and cut your strips all to the same width or smaller if you want to leave a boarder like I did and then all you have to do is work out the length of the panels your working on to get them ready to pop on the card.
FRONT
 
 BACK
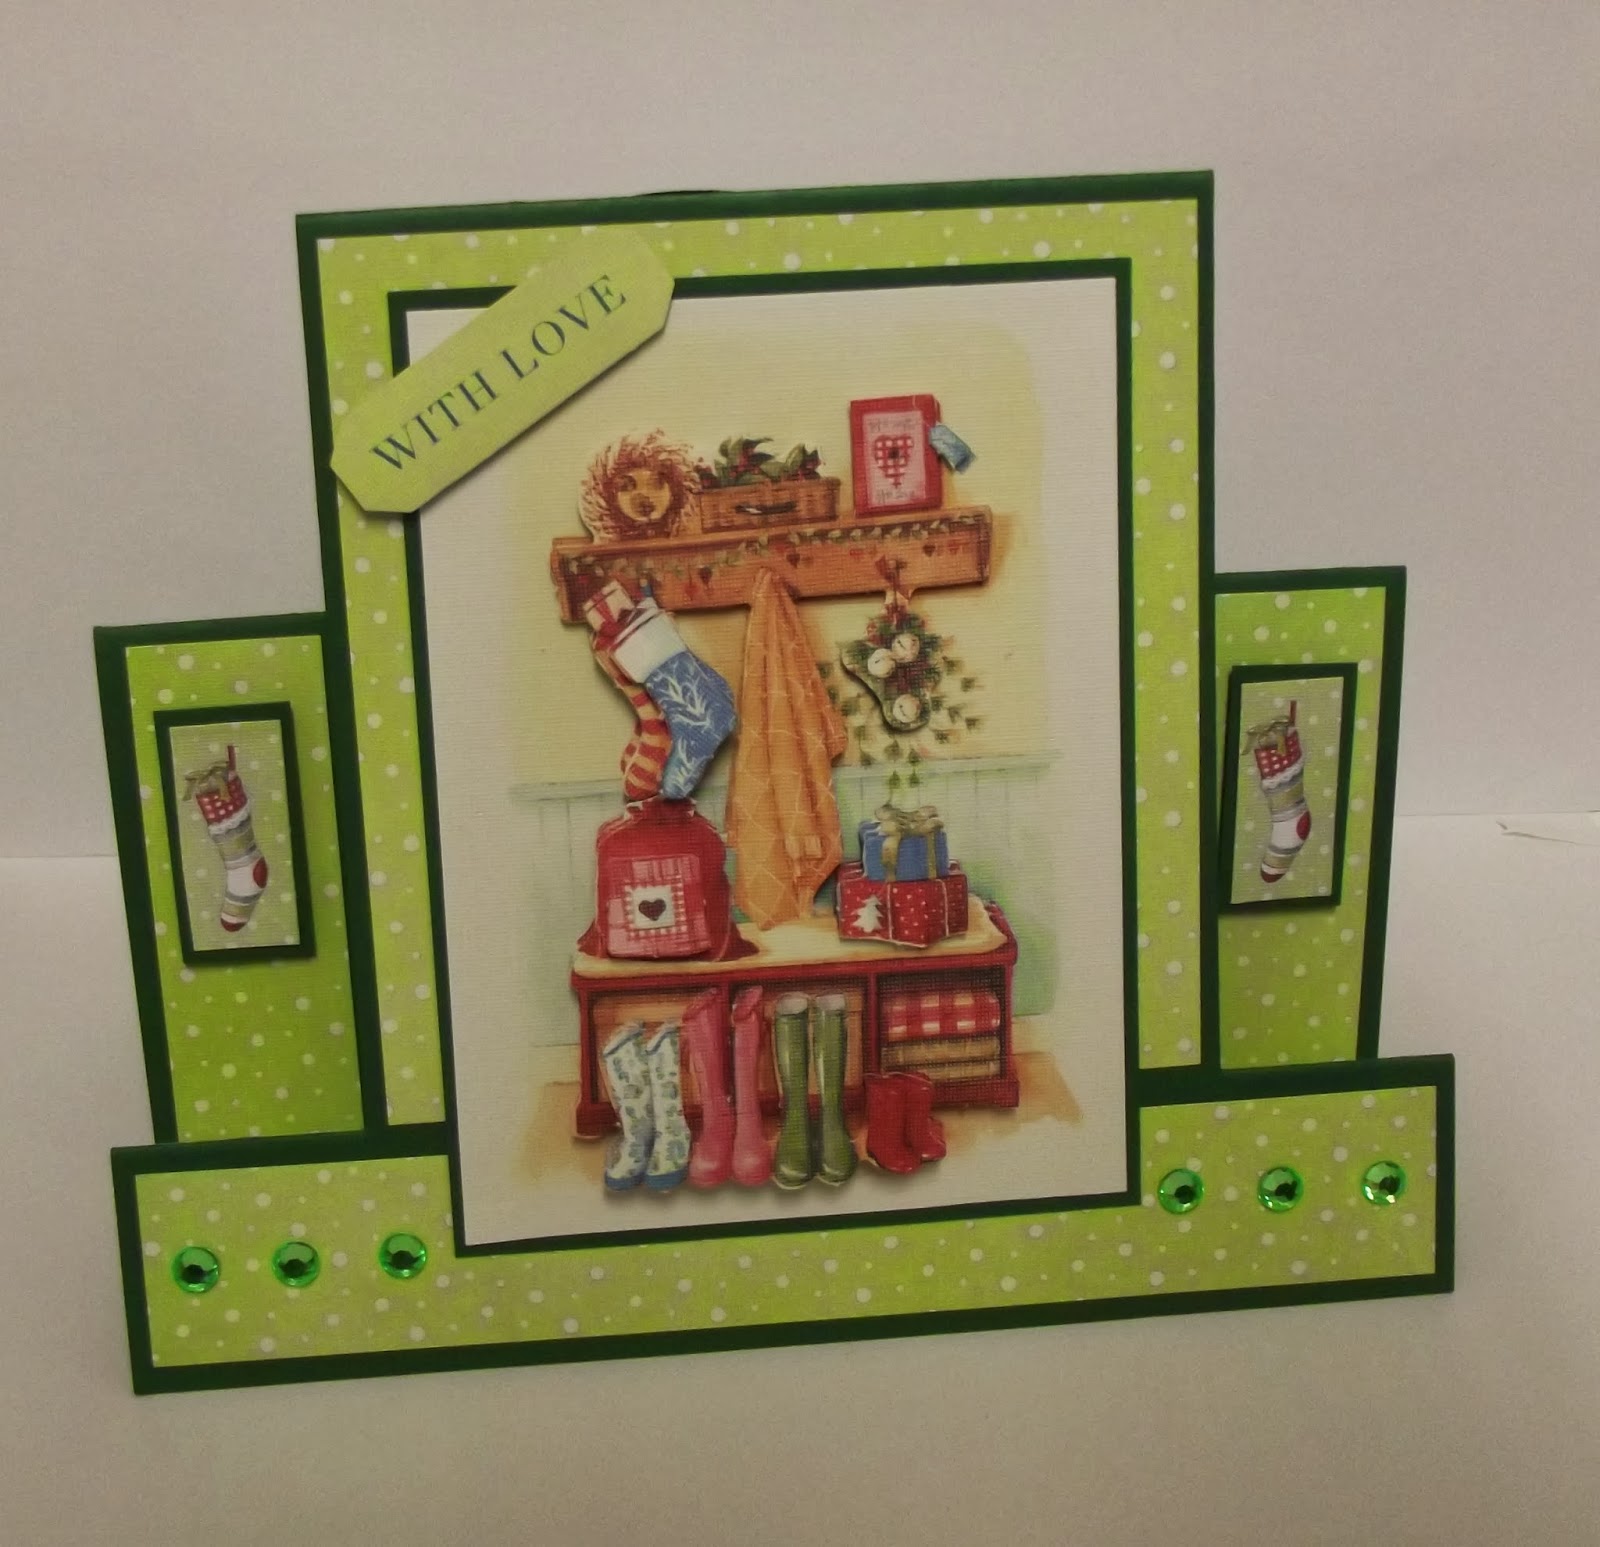
I hope you find this an easier and quicker way to make your front panel cards, I have to say I love it.

Happy Crafting :)

Sunday, July 7, 2013

Insanely easy Tri Fold Card tutorial!

I deny that I am lazy but I confirm that I love the easy option when it comes to making fantastic folds in cards. There is so much measuring that has to be done for cards ¼" here 3 7/8" there. Bah............there has to be an easier way :). Whooooooooooooo. it is my mission to find them!!!!

So this is the first post in what I hope will be a series of insanely easy  folds all made with a bit of scoring and the width of your ruler acting as your guide :) 

The width of your ruler will decide the height of your bottom and top panels, so if you have larger sayings or embellishments you want to use on these panels then just use a wider ruler.

Tutorial
Cut a piece of card 12" long by any height you want. Mine here is 5" as I will be using small embellishments.

Score your card at 2", 4" 8" and 10"

Place the bottom of your ruler to the bottom of your card (long end) and cut a line with your craft knife along the top of the ruler from the first score line to the last. In other words from 2" to 10".


Now turn the card so the second long side is facing you and repeat the process by placing the bottom of your ruler along the bottom of the card and cutting from the first score line to the last score line.

Fold the card as shown in the photos below.


Push together making sure all the folds are going in the direction you have folded them.(mountains up and valleys down)

It will look like this.
Flip over to the other side and this is the front of your card.
Now open up and embelish the panels.

Well what do you think..........easy enough? If you have any questions just give me a shout in the comments below.

If you look at my earlier tutorials down the right of the blog page you will see one for a lazy front panel card tutorial and this is another great fold to have a go at if you enjoy making fantastic folds in your cards.

Happy Crafting Everyone :)

Friday, June 14, 2013

A working clock card!


For the longest time I have wanted to incorporate a working clock into a card, don't ask me why ...........I just did! Well finally I have done it. These are the kind of quirky projects I love to work on.

My big sister asked me to make a card for her friend Nicola. Now my sister is a sweetheart and is so good to me so I wanted to make something really special. (my little sister who never got a 40th birthday card from me.............don't read this post!!!.....lol............it's coming, its coming!!!!)

I was walking around our local Euro Shop here in Bray and they had little alarm clocks for €1.00 so I took the chance and bought one. Hubby dismantled it for me and I built in into the card below. It is still working and so as not to be mean I dismantled the alarm so it wouldn't go off while it was sitting on her mantlepiece (there is no way to get at the back to turn the alarm off..........hehehe......she would not have been impressed).

When  I get an idea in my head I have to complete the project before the creative flow disappears so this was an all night project. I started at about 9pm and finished at about 9.15am. There was a lot of messing about with sizes, making something hating it, trying something else,  remaking, remaking and remaking. I have to say I love how it looks but at about 3.25am I was not feeling in such a loving mood towards it! Getting the vision of what I wanted and working out the dimensions to make it happen always tends to be my bug bear. So have a peak and see how it turned out. I would love to know what you all think.

This photo below shows the front of the card. I wanted to keep it quite simple as the inside of the card is the showpiece.
 In this photo you can see that the card had to be quite wide to be able to take the clock mechanism. To protect the clock the card has been reinforced with hard card so it it quite heavy and like a box. The side flap shown on the right is kept closed with 3 hidden magnets.
 Here you can see that the card has loads of concertina folds in it. These hold the clock in place and create a large gap for the clock mechanism to sit in. At this point it still hides the secret of what is inside.
Card opening.................oooooh............hehehe. See the bit of red tape on the side. That stuff is so static it sticks to everything. I obviously removed it before I gave it to my sister but I found it about an hour later stuck to my jumper!!!! I was so busy taking the photo that I missed seeing it in the picture!
 And voila..........the inside of the card. When my husband took the clock apart  I cut a piece of hard cardbord to the size I wanted and decorated it. I punched a hole in the middle and placed the section that holds the clock hands through the hole. Then I got Gary to reattach everything and get it working again.  The card needed to be strong enough to hold both the clock and the battery to make it work.. I then trapped this card between the front folds of the concertina fold frame I had made so that it was suspended and had space at the back for the mechanism. .

A card this big needs a box to hold it, thee photos below show the box I made for it to sit in.

As I type this I have just received a text from my sister saying her friend, the guests and the staff at the resturant loved the card  so that's Happy Days for me :)

Ok, time for me to go for a sleep as  I have just spell checkd this blog post and had to add in loads of words I missed out and change some very unusual spelling!!!

Happy Crafting everyone :)

Tuesday, June 11, 2013

Get Well Soon Cards including Man Flu!!

These are my favorite Get Well cards. Yep, that's a little tissue box on the front of them. I made the more elegant card first and then my husband made the great suggestion to make a Man Flu card. Everyone who receives these cards loves them.

This card was made with some free digi papers and a free digi greeting.
 
This card was made with the papers and letters from the Docrafts Wellington Ultimate kit. I doubt you'll be able to find the ultimate kit anymore but if you see the papers in any of the shops GRAB THEM. They are excellent for mens cards.

I hope you like the cards as much as I do.

Happy Crafting Everyone :)