Showing posts with label Paper Folds. Show all posts

Thursday, October 3, 2013

The Very Lazy Front Panel Card Tutorial


Look at me back to blogging after months off.!!! I decided to take the Summer off from the blog to catch up on family and home stuff and to just take a little break and I have to say I feel better for it :) I will still be blogging as much as I can but time is becoming a bit precious around here with Christmas on its way, school exams on the horizon , the big free workshops at the Bernardo's Charity Event  (12th October in the Tara Towers Hotel, Rock Road, Dublin) and 2 Card workshops at Inspiring Ideas in Blanchardstown (16th October and 13th November - See Demo 2013 listing on the right of the blog). I have had family and friends working away to help me get ready for everything so hopefully I can find some time to pop on  a couple of times in the next few weeks to put on another few posts :)

I have still been demoing throughout the Summer all over Ireland and I thought for my first post back after many months away I would show something close to my heart....................a lazy fold!!!

This is a front Panel card that many of you will have seen around the place but there tends to be a lot of measuring so I thought to myself  - "how can I make this the ............LAZY way.

For those of you who saw it in my demos you will appreciate how quickly you can do this and for those of you who haven't just give it a try. I can make the card (minus decoration of course) in less then 1 minute  - AWESOME :)

All you need is A4 card, a 12" ruler (any size), a light pencil and a craft knife. The ruler can be any size as the size of the ruler determines the size of the panels. Just pick the long ruler you normally work with and see what you produce. The size of the card can change depending on the size of card you want to make but to start off just go with using A4 size and play around with other sizes later.

So here it is:

THE VERY LAZY FRONT PANEL CARD TUTORIAL :)


Take an A4 piece of card and fold in half. Short side to short side.

 Place the bottom of the ruler to the bottom of the page (the open part not the fold. and draw a line across the page.
 Now turn your card sideways and place the bottom of your ruler to the bottom of the card. (the drawn line will be on your left hand side) Now using a craft knife cut from the drawn line to the folded spine
 This is how it will look when cut. Ensure you have cut through both pieces of the folded card.
Now turn your card so you are working on opposite side and do the same as before - place the bottom of your ruler to the bottom of the card and cut from the drawn line to the spine ensuring to cut through both pieces of the folded card. (the drawn line will be on your right hand side)
 It will now look like this after you have cut it.
 Turn the card again so the drawn line is close to you and place the bottom of your ruler to the bottom of the drawn line.
 On the left and the right thin panels draw a line
 It will look like this.
Score only the small lines on these 2 panels. Ignore the line in the middle panel. So you will score 2 small lines on the left thin panel and 2 on the right thin panel

 Fold in a mountain for the panels marked M and in a Valley for the panels marked V. Do this on both the front and back of the card.
 It will now look like this.
.
Rub out all your pencil marks and decorate.

Because you have used the width of your ruler you will find that all the panels (bar the middle back and front) are the same size making it much easier to just measure your ruler width and cut your strips all to the same width or smaller if you want to leave a boarder like I did and then all you have to do is work out the length of the panels your working on to get them ready to pop on the card.
FRONT
 
 BACK
I hope you find this an easier and quicker way to make your front panel cards, I have to say I love it.

Happy Crafting :)

Sunday, December 23, 2012

Double Opening Card Tutorial

This card goes to prove that crafters are forever thinking about folds and a lot of the time we hit upon the same ideas. I came up with this fold about 2 years ago. At the time I loved the fold but just couldn't take that step to decorate it and make it pretty.

2 years later and I am surfing crafting sites and I find a girl who has come up with the exact same fold and measurements as that's the way this card just works! What was wonderful was she had taken the step I had failed to ............decoration. So all enthusiastic off I go in search of my original fold..........not an easy job as I have boxes full  of folds that I try out, promise myself I will get back to and then get distracted by the next thing!! Well this girl just inspired me to find the card and go for it. I can't find her blog anywhere now and if any of you come across it on your travels please drop me a mail as I would love to give her a shout out for her decoration inspiration. :) This is a great way to use all those teeny tiny toppers that you have hanging around after you have made all your other projects. So go on...........dig them out and give it a go.


 Cut a piece of card to 12" long x 6" high (you can adjust the height of the card if you wish)

Score at 1", 2", 4", 8", 10" 11"
Left hand side scores


Right hand side scores
On the left side fold inwards at the 4" score
Then outwards at the 2" score
Fold inwards the 1" score
This is how it should look now.
Now do the same on the right hand side. Fold inwards at the 8" score, outwards at the 10" score and inwards at the 11" score.
Your card is now ready to be decorated.

Cut out        6 x ¾“ wide strips of patterned paper
                   2 x 1¾“ wide strips of patterned paper
 The height you cut these depends on how tall you are making the card. What you are aiming for is a nice little boarder all the way around.
See photos below for where the strips will be placed.
2 on the outside 1" panels
4 on the inside 1" panels.
Now on the outside 2" panels place the 1¾“ strips of paper. Do this on both outside panels.
This is what your card should look like now.
If you flatten out the three right hand side panels you will see there is a strip not decorated. Place strong double sided tape along this piece.
Remove the tape covering
Fold this piece down onto the 2" section as shown below rubbing over it to ensure the tape takes hold.

This is what it will look like now.
Do the same on the left side and the card should now look like these photos below.

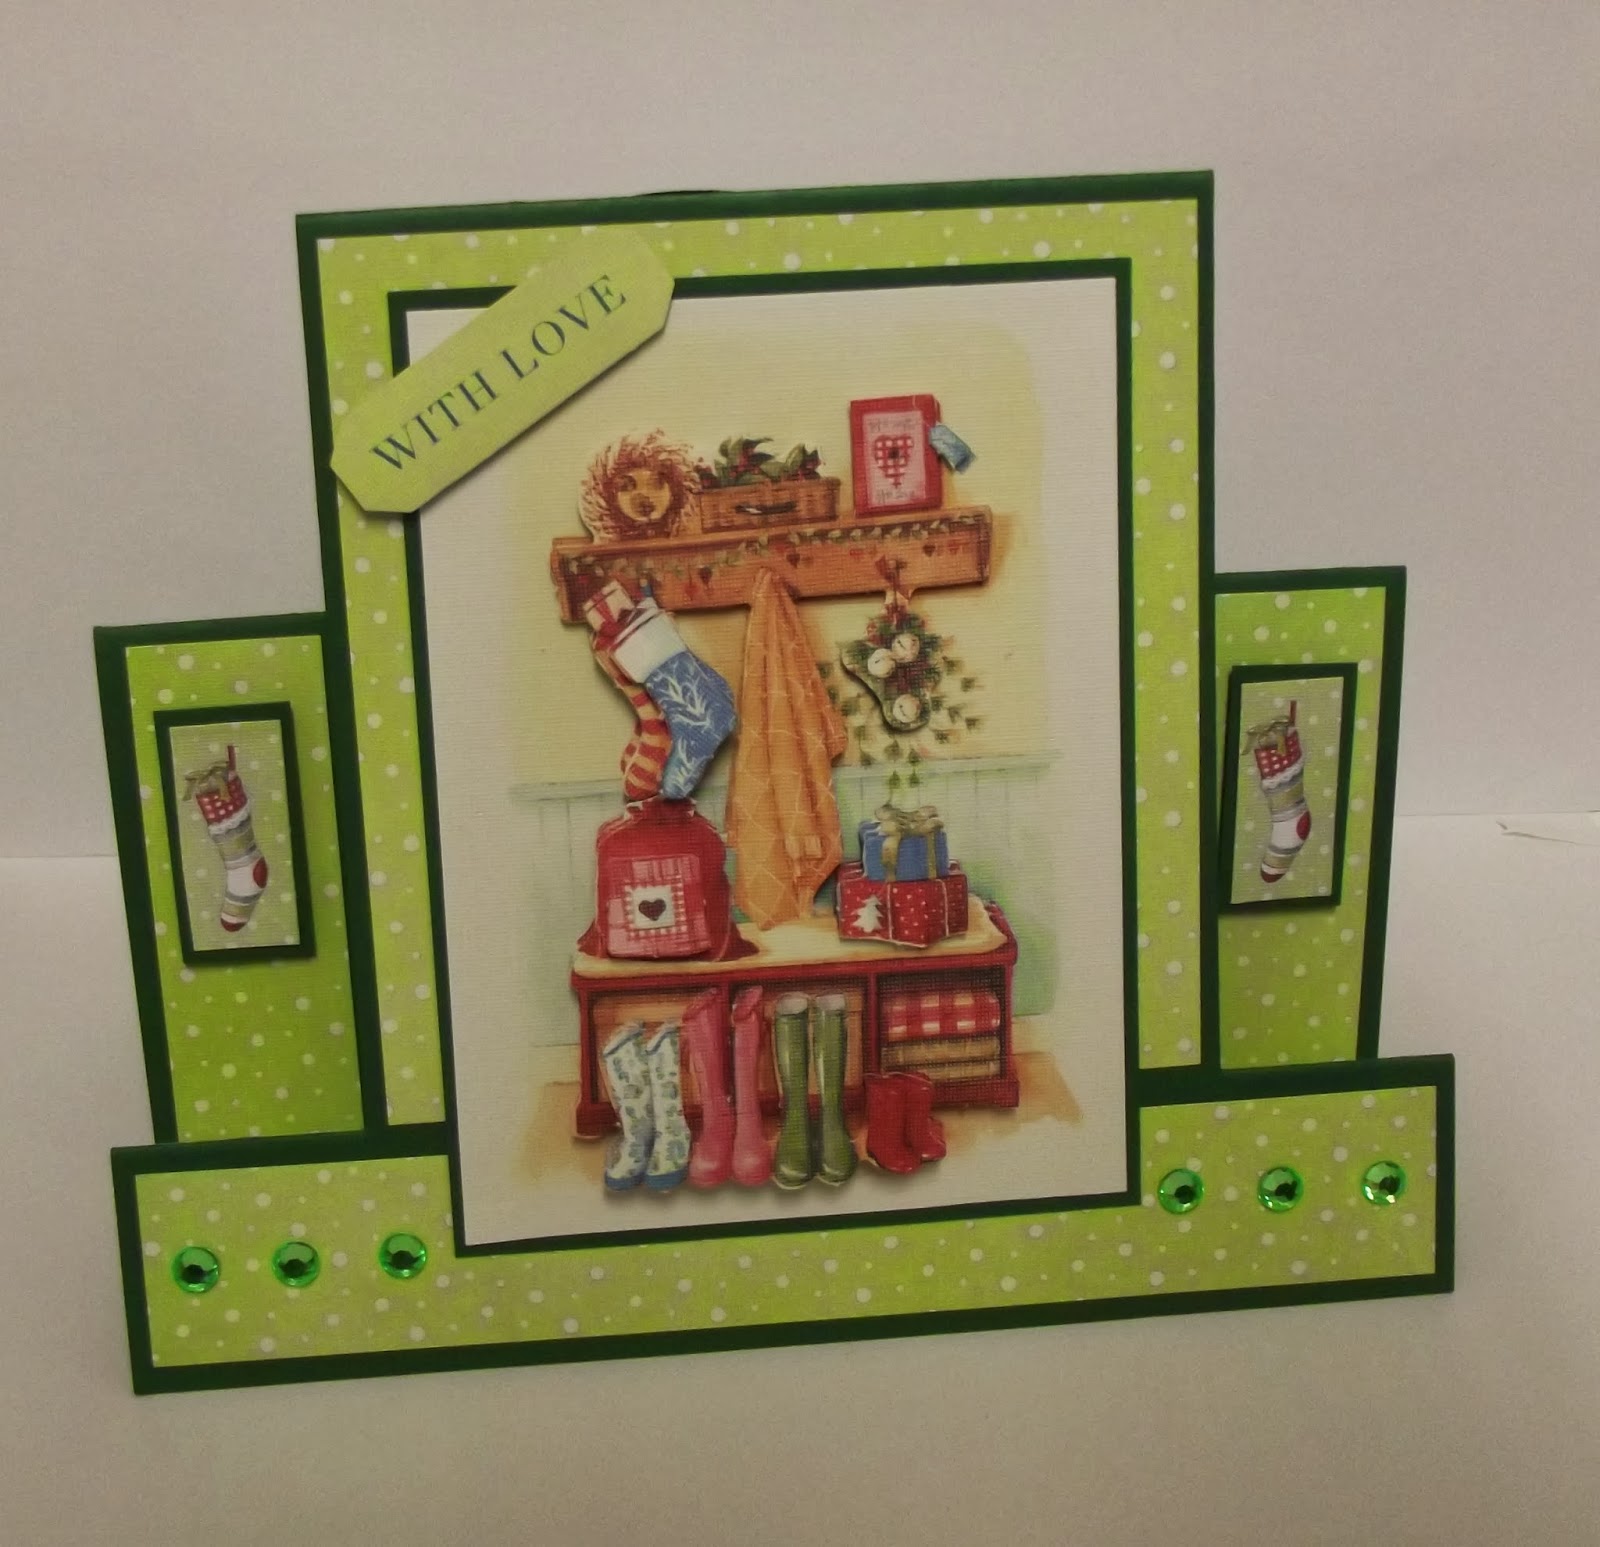
 Decorate the inside......
Get your 3 mini toppers and mount them onto some matching or contrasting card. These toppers need to be less then 2" wide.
 Now place your tape on the back . Two with pieces of tape on the right and one with tape on the left.
 Stick your toppers down on the left or right panel of the card. This card has two stuck to the right panel and one stuck to the left panel.
 See the way they interlock.......so cool.
Now you need another 2 toppers. I have made mine circular and again they need to be less then 2" wide.
 These go on the outside 1" panels. Stick one on the left and one on the right.Make sure these toppers stay within the two 1" panels as if you don't they will get crushed when you open the card.
Place a piece of double sided tape on the back of the card centrally (ignore the ribbon in the shot at this stage, I just forgot to move it!!!!)
Now place a piece of ribbon over the tape on the back whilst leaving plenty of ribbon either side.
 Wrap the ribbon around the front of the card and tie a bow.

Hope you all give this a try.

Happy crafting Everyone :)