Well what a week. I had the trauma of loosing my internet for over a week. To be honest I didn't quite know what to do with myself!!! I am so used to sitting on line and searching out ideas, playing on Facebook and checking my emails that when all those facilities were gone I had to actually .............wait for it..........clean the house.............Aghhhhhhhh, so wrong!! Lol..
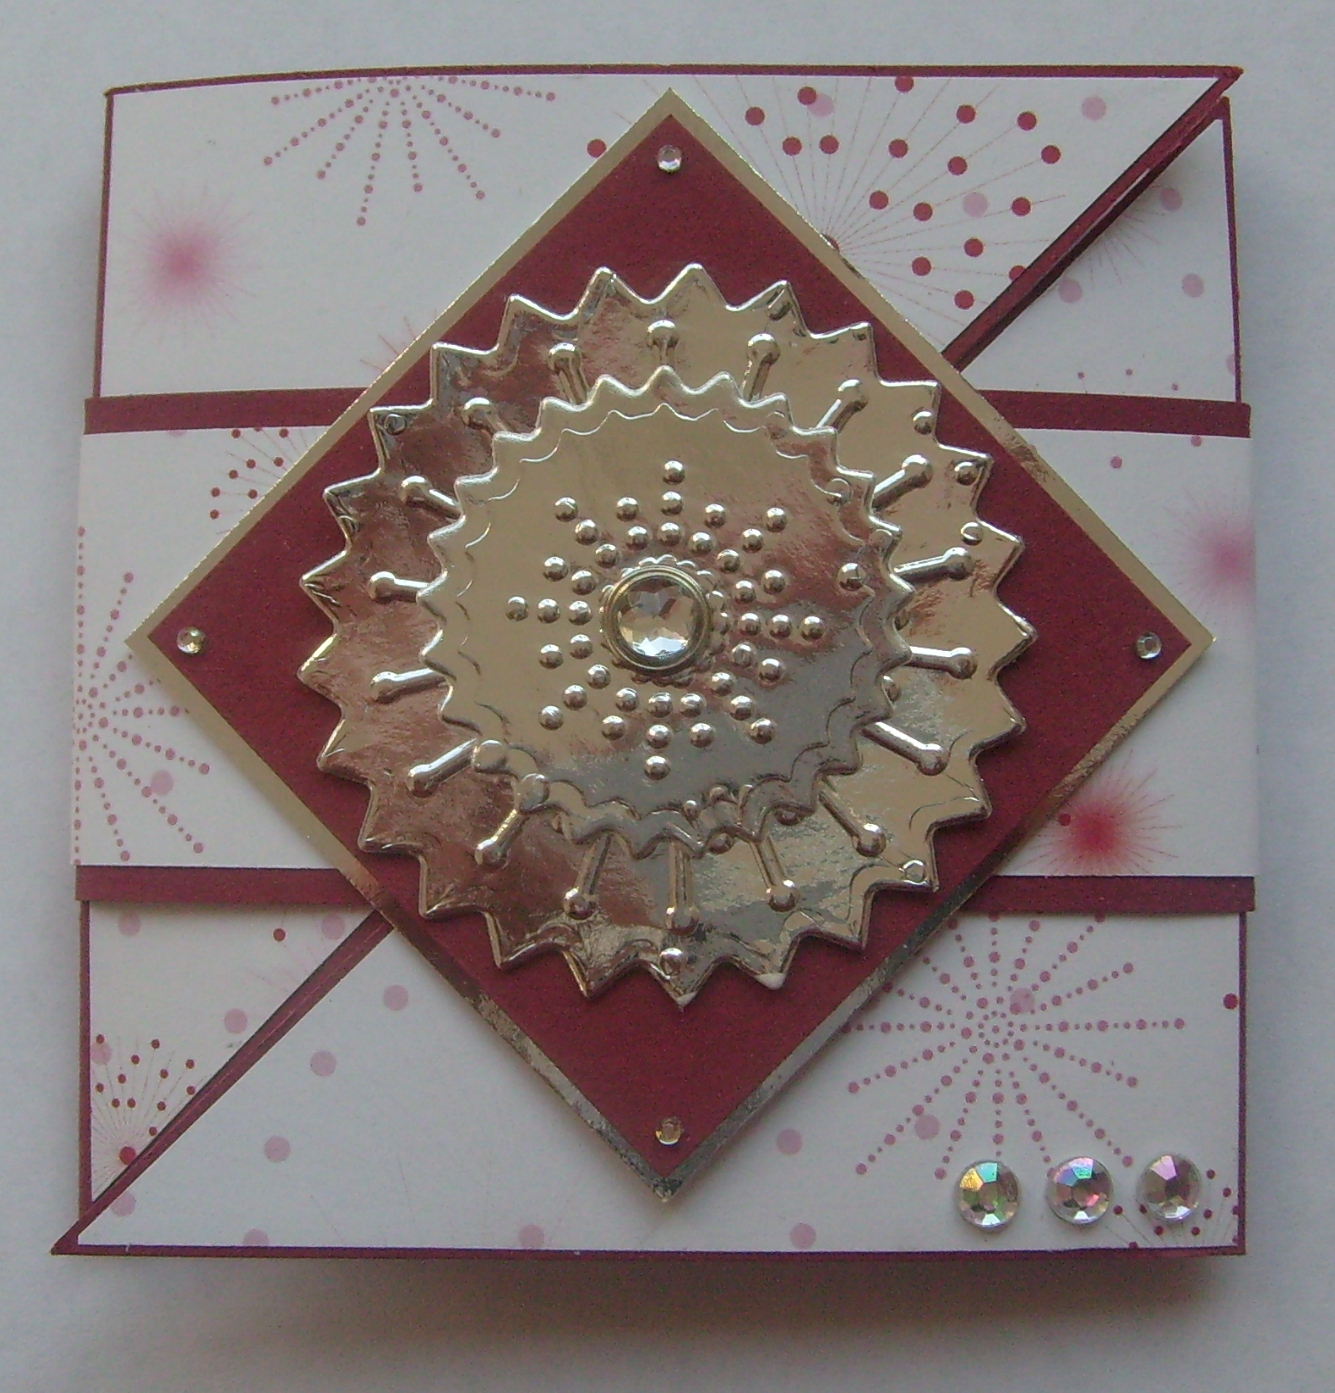
This is a card fold I have seen all over the internet in lots of different sizes. I settled on the size below because I like the fact that it fits nicely into your hand when closed but by the time you have opened it completely you have to hold it in both hands. Ah, its the little things that make me happy (well the little things and Coffee!!)
Right so here we go...............
All measurements are in Inchs.


You need 3 pieces of card stock:
(Largest piece)
Cut cardstock to 3½" x10 ½"
Score at 3½" and 7"

Middle piece)
Cut cardstock to 3¼" x 7¾"
Score at 2" and 5 ¼"
On the back of the central panel place double sided tape for later.


(Smallest piece)
Cut cardstock to 2½" x 7"
Score at 2" and 5"
On the back of the central panel place double sided tape for later.

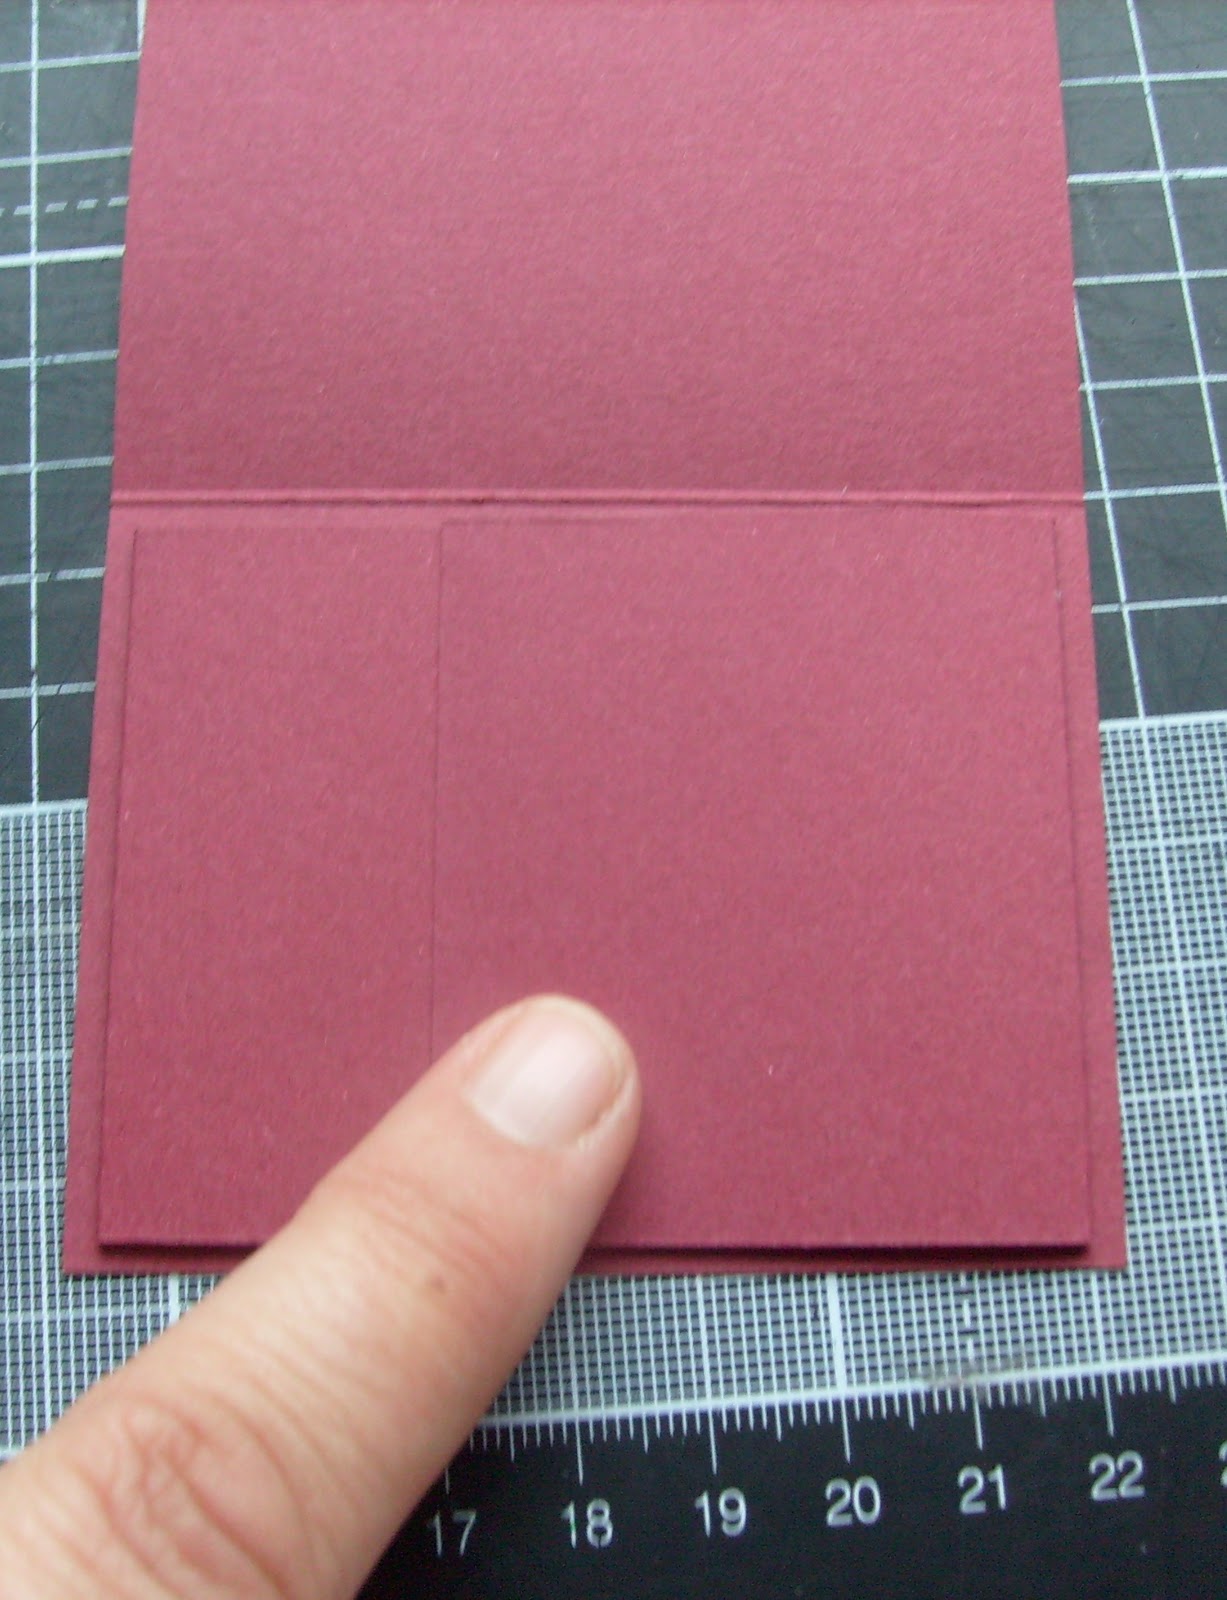
On the left hand side panel of your largest piece (3½" x10 ½") make a diagonal cut from the top left corner to the bottom right corner. Do the same on the right hand side panel. (see photo). You don’t need these cut off sections so put them aside.

Now that all your pieces are cut you are ready to put them all together. Take your smallest cardstock piece (2½" x 7") close up the folds and remove the double sided tape from the back of the center panel.
Have your middle piece (3¼" x 7¾") facing you long ways with the largest bottom panel closest to you. Place the (2½" x 7") on this bottom section, you will end up with a little boarder all around it.
Close up all your folds again and take these joined pieces and remove the double sided tape from the back of the central panel and now place this in the centre section of your largest panel.
Yes, these last few photos are blue, I took all the photos and then realized that I missed out this section and had to re-photograph and you guessed it none of the previous color to be found!!!!


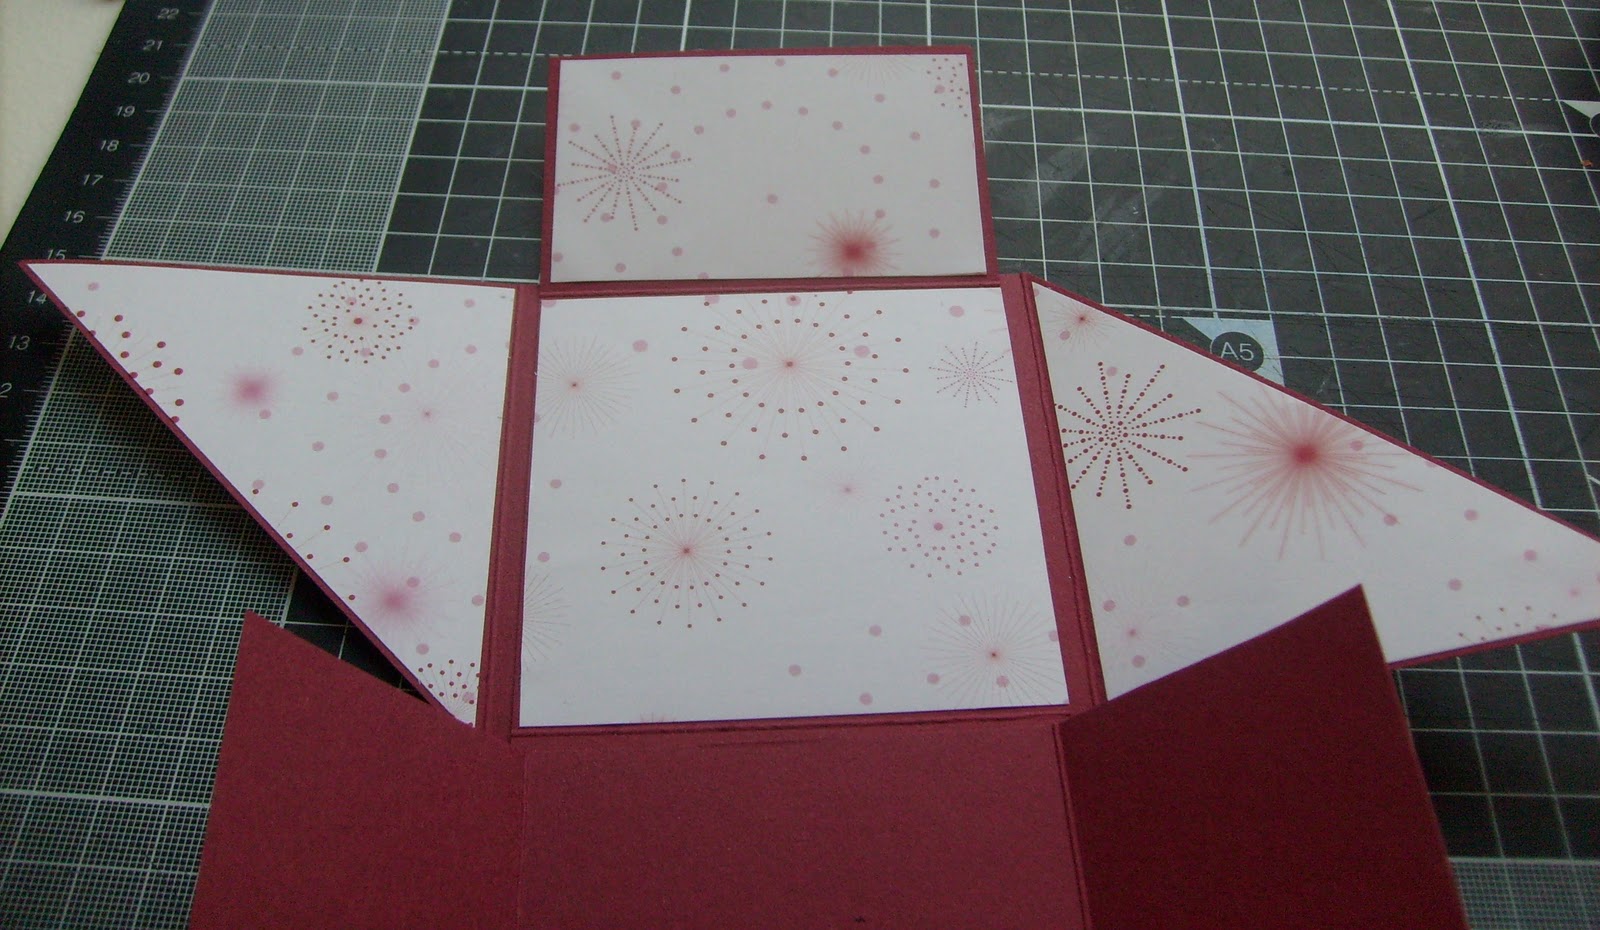
Your card will now look like this n when opened up. (yep, back to red!!)

Your card is now ready to decorate.
I am changing to centimeters here for measuring the patterned paper as it is easier while working with my guillotine.
Cut 2 squares 85cm x 85cm and cut them in half diagonally and place them on the back and front of the diagonal flaps on your card.


Just measure each panel and cut patterned paper to fit. (some of the process is shown here)


Keep going until all the panels are decorated and then embellish to your hearts content. :)
Once you have completed your embellishing its time to make your Belly Band, always embellish first as your card will increase in thickness (sounds a bit like my waistline!) and you want to get your belly band just right.
(These photos are from before I decorated as I realized afterwards its better to embellish first.)
BELLY BAND.
Cut a piece of card to 1 ½ x 8 ½
Hold it to the front of your card and then gently wrap it around the card. Do not make it too tight as you want to be able to slip the card out to open it. Using double sided tape (strong) join the band at the back (cut off any excess you don't need at the back).


Decorate your belly band and you are finished.
To make the little silver embellishments I embossed silver card with the Do Crafts Winter Wonderland Embossing Folder (Snowflurry) and then I used the XCut Nesting Dies Spiro Circles to cut out one of the snowflakes.

I hope you like it and have fun making it. :)
fabulous creation, great tutorial thank you and love those papers don't you, thank you for the lovely comment
ReplyDeletehugs Kate xx
ps I have candy if you are interested :)
Hi Kate, Thanks for the comment. Popping over to look at your blog candy now :)
ReplyDeleteŚwietna instrukcja spróbuję zrobić taką kartkę
ReplyDelete