


Well how did we suddenly get to Day 7 of Tutorial Week. I can't believe a week is already up. I have had great fun doing this and I have been so excited every day to see any comments you have left.
For my final tutorial of the week I am going to show you a Hidden Panel Card. These are great because you can use all of your flat embellishment inside. We tend to get very focused on making items 3D and making them pop off the card so this is a nice card where you have a ready made excuse just to keep it as flat as possible!!!! You can do so much more with these cards than I have shown. I just wanted to keep the cards very simple just to give you the idea of what it can look like.
I love when people open this card and think that maybe you haven't stuck it together properly and then they discover that it is actually a hidden panel inside. lol. I have even had people say "Oh Cliona its coming apart" and then realized that its part of the card. They love it.
I have made this card in A4 but you can actually make it in any size you want. Just take your piece of card and follow all the instructions below and you will produce the same results no matter what size you use.
Right here we go:
Take an A4 sheet of card

Now take the top piece of the folded card and fold it in half back to to the spine


Cut two strips of coloured card to the same size of this panel. You are going to be fitting these into the card. My preference is to cut them to the same size as the panel and then if they don't fit in neatly - (they could cause slight buckling when you close the card) then you can cut a small sliver off the panel and try again. You want these panels to fit neatly. (not so tight as to buckle the card and not so loose that they slip out of the card). It is worth taking your time with this so you don't have to start cutting them again from scratch.


Take one of the panels and starting on the left section put the panel through the top cut down the back and out again through the bottom cut.


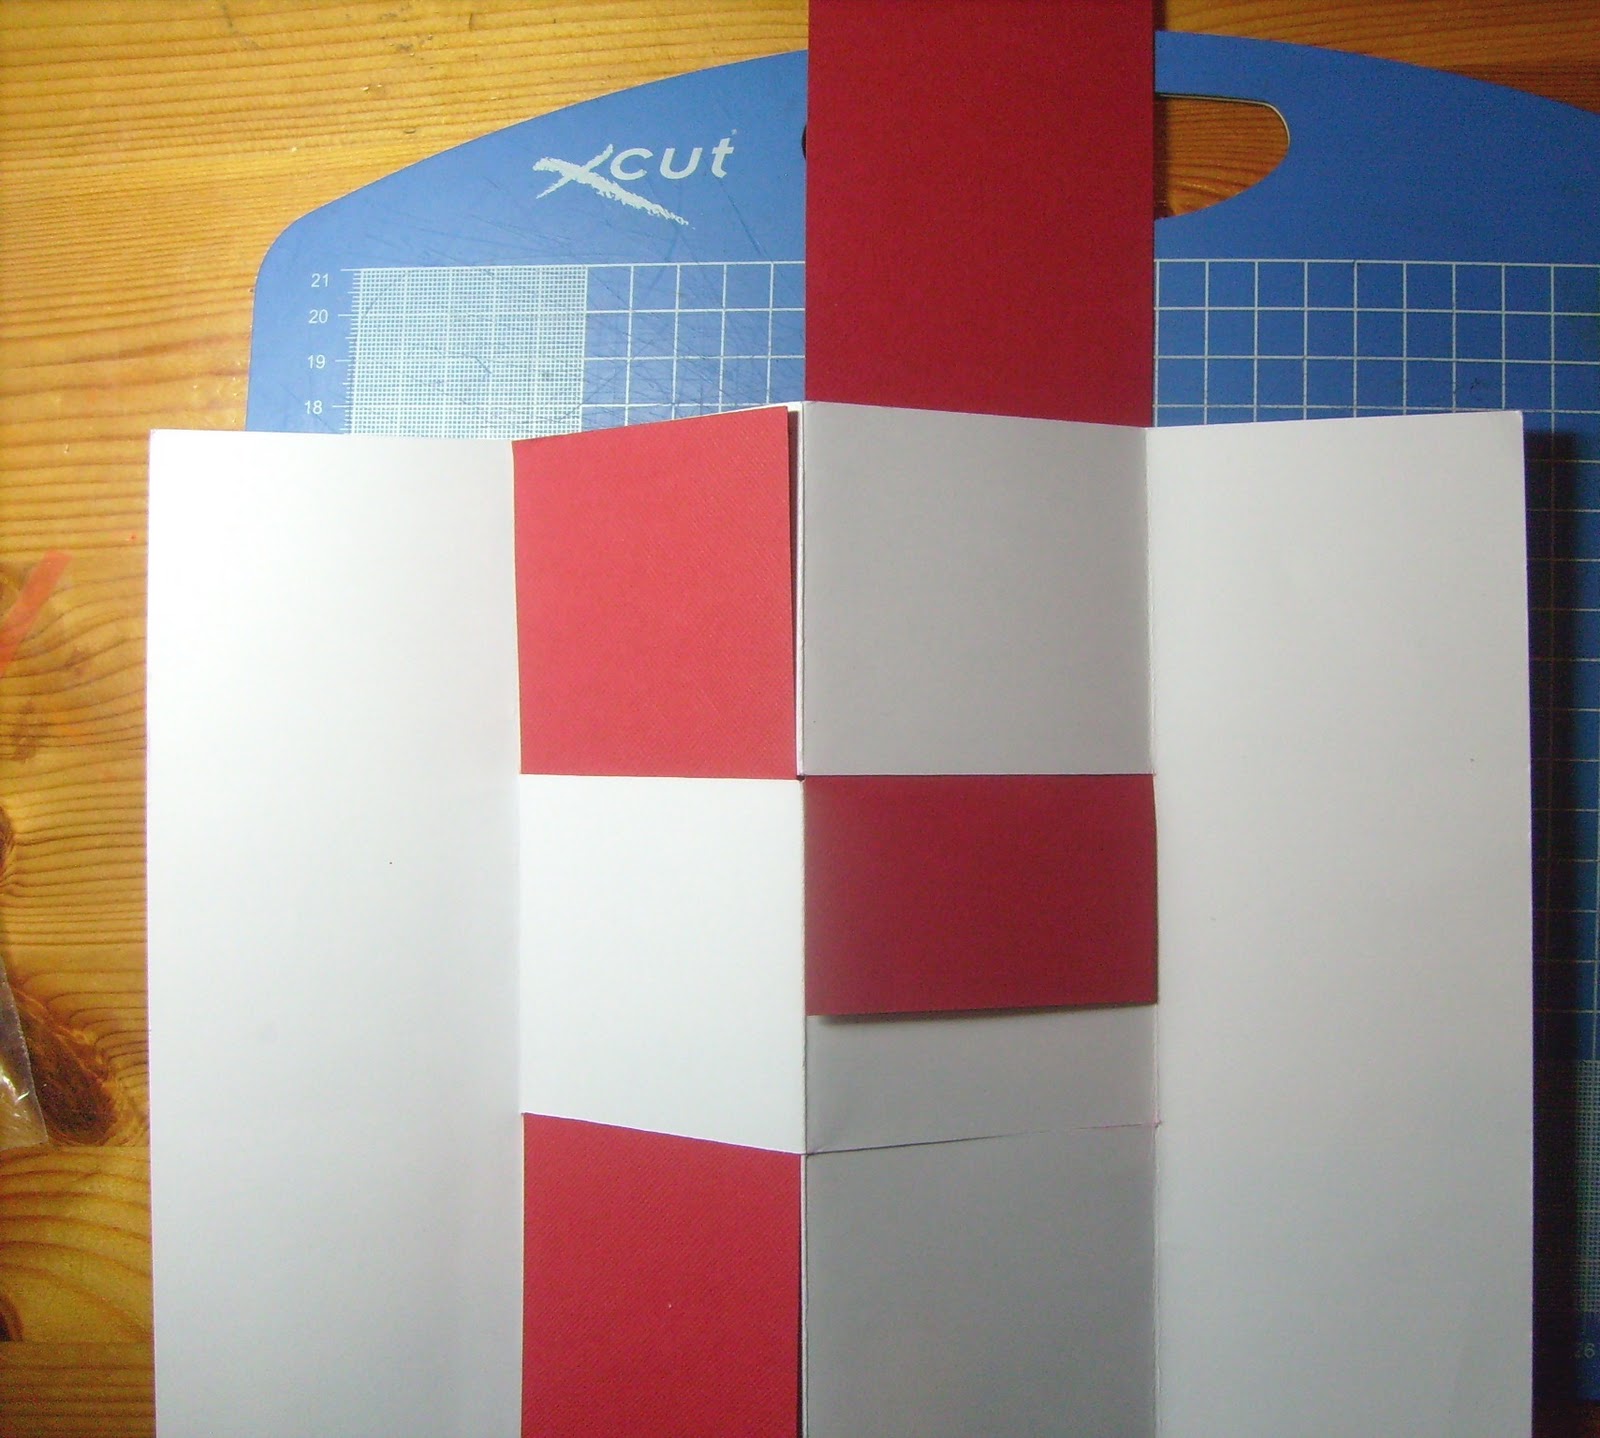

Where is the hidden panel you ask! In the middle section pull the sections apart. They will be quite tight to start with and the more you play with this card the easier it is to open and in fact it becomes quite obvious to the recipient that there is an extra panel.


This is the hidden panel when it is open.

Now pull on the white side panels and the centre panel will pop back togeather and leave the card as shown below.


Great tutorial!!!!
ReplyDeletegreat tutorial and love how you have used these gorgeous images too
ReplyDeleteHugs Kate xx
Wow - well done with your week of Tutorials - mentler....... now have a rest! lol
ReplyDeleteFab tutorials all week xxx
Just made a mock-up of this in printer paper to get my head round how it works - you can fix the red strips in to make it more secure - when you have the card open (hidden panels closed) where the white panels go over the red, you could use a brad (with a small piece of paper to hide them on the back of the card), or with a dab of glue or DST.
ReplyDelete