I deny that I am lazy but I confirm that I love the easy option when it comes to making fantastic folds in cards. There is so much measuring that has to be done for cards ¼" here 3 7/8" there. Bah............there has to be an easier way :). Whooooooooooooo. it is my mission to find them!!!!
So this is the first post in what I hope will be a series of insanely easy folds all made with a bit of scoring and the width of your ruler acting as your guide :)
The width of your ruler will decide the height of your bottom and top panels, so if you have larger sayings or embellishments you want to use on these panels then just use a wider ruler.
Tutorial
Cut a piece of card 12" long by any height you want. Mine here is 5" as I will be using small embellishments.
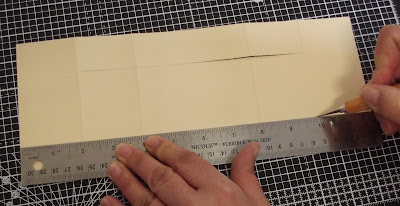
Score your card at 2", 4" 8" and 10"
Now turn the card so the second long side is facing you and repeat the process by placing the bottom of your ruler along the bottom of the card and cutting from the first score line to the last score line.
Fold the card as shown in the photos below.
Push together making sure all the folds are going in the direction you have folded them.(mountains up and valleys down)
It will look like this.
Flip over to the other side and this is the front of your card.
Now open up and embelish the panels.
Well what do you think..........easy enough? If you have any questions just give me a shout in the comments below.
If you look at my earlier tutorials down the right of the blog page you will see one for a lazy front panel card tutorial and this is another great fold to have a go at if you enjoy making fantastic folds in your cards.
Happy Crafting Everyone :)


