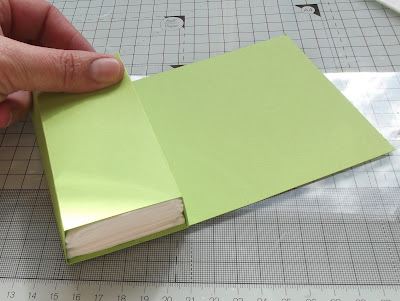
Cut a piece
of cardstock A4 height by the width of your tissues
Score down
the shortest part of the card at: 1”, 2”, 4”, 5” and 7”
Fold all
scores inward and strengthen folds with a bone folder.
Now place your tissues inside just to check they fit. I have used anything from 4 to 6 tissues as it depends on the brand that you buy.
Once you are happy with the fit of the tissues decorate
all the panels that will be seen in patterned paper.. When you have done this wrap your cardstock
around the tissues again just to ensure you know where to cut the hole for the
tissues (sounds basic, but its not very funny when the hole ends up at the bottom.....lol)
Cut the
hole with your Big Shot or draw a rectangle by hand on the back of the
panel you are cutting into and cut this out with a craft knife.
Place double sided tape on the first two 1" panels. Place the
tissues on your project and wrap the cardstock around them. (as shown in the image above minus the decoration) Join the panels together.
Finish decoration and you are done.
Happy Crafting Everyone.


cool!!, fab idea :) thankyou for the tutorial photos
ReplyDeleteReally fab fold and a great tutorial, thanks for sharing
ReplyDeleteLindsay xx
AWW this so lovely. Such a great tutorial and I love image of Boofle
ReplyDeleteSue
Fab little tissue holder, thanks for sharing the tutorial. Tinaxx
ReplyDeleteIts super cute and looks easy as you said!
ReplyDeleteCheers from Bangalore, India
Sonia
cardsandschoolprojects.blogspot.com
Hey,
ReplyDeleteThis is such a easy one to make and yet so beautiful...
great idea...
What a fabulous project your examples for the tutorial are so sweet with this adorable puppy. Thanks for sharing such a wonderful tutorial. I have quite a few of these little packs of tissues I may just have to try this. xx
ReplyDelete