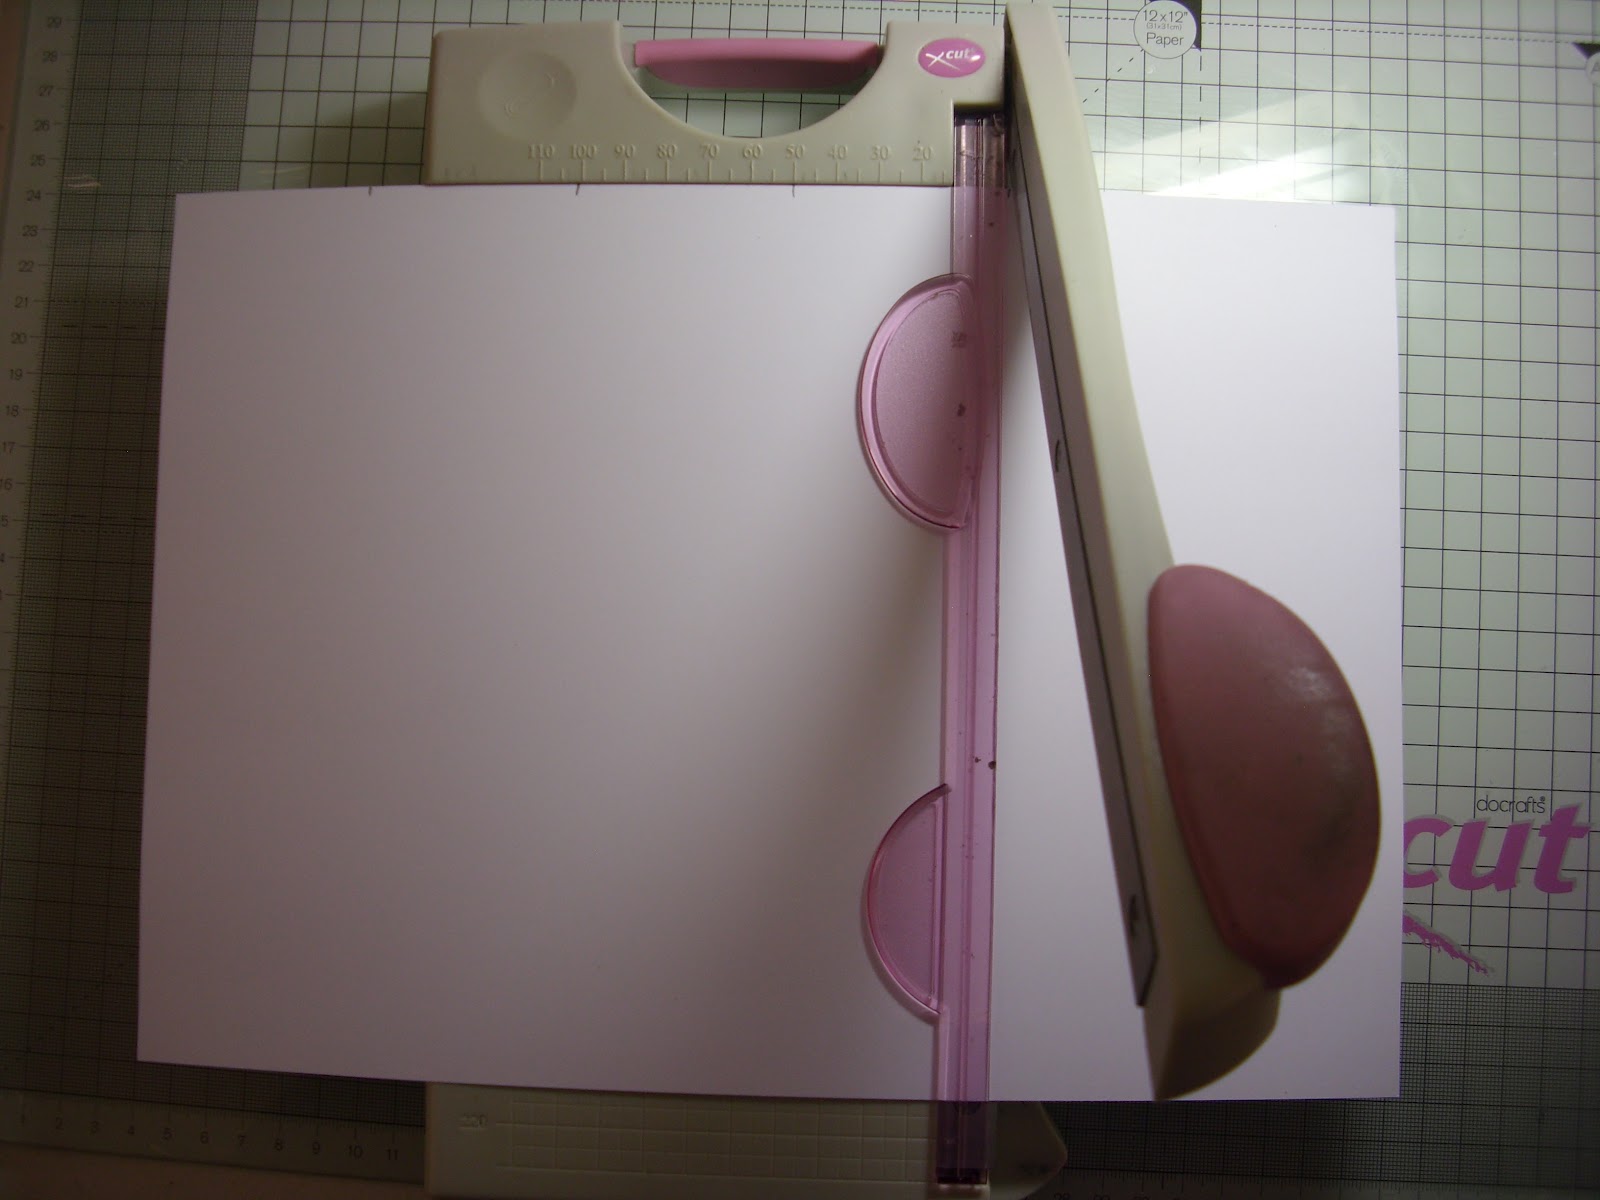
Wednesday, May 30, 2012

Super Easy Tissue Holder Tutorial


Cut a piece of cardstock A4 height by the width of your tissues
Score down the shortest part of the card at: 1”, 2”, 4”, 5” and 7”
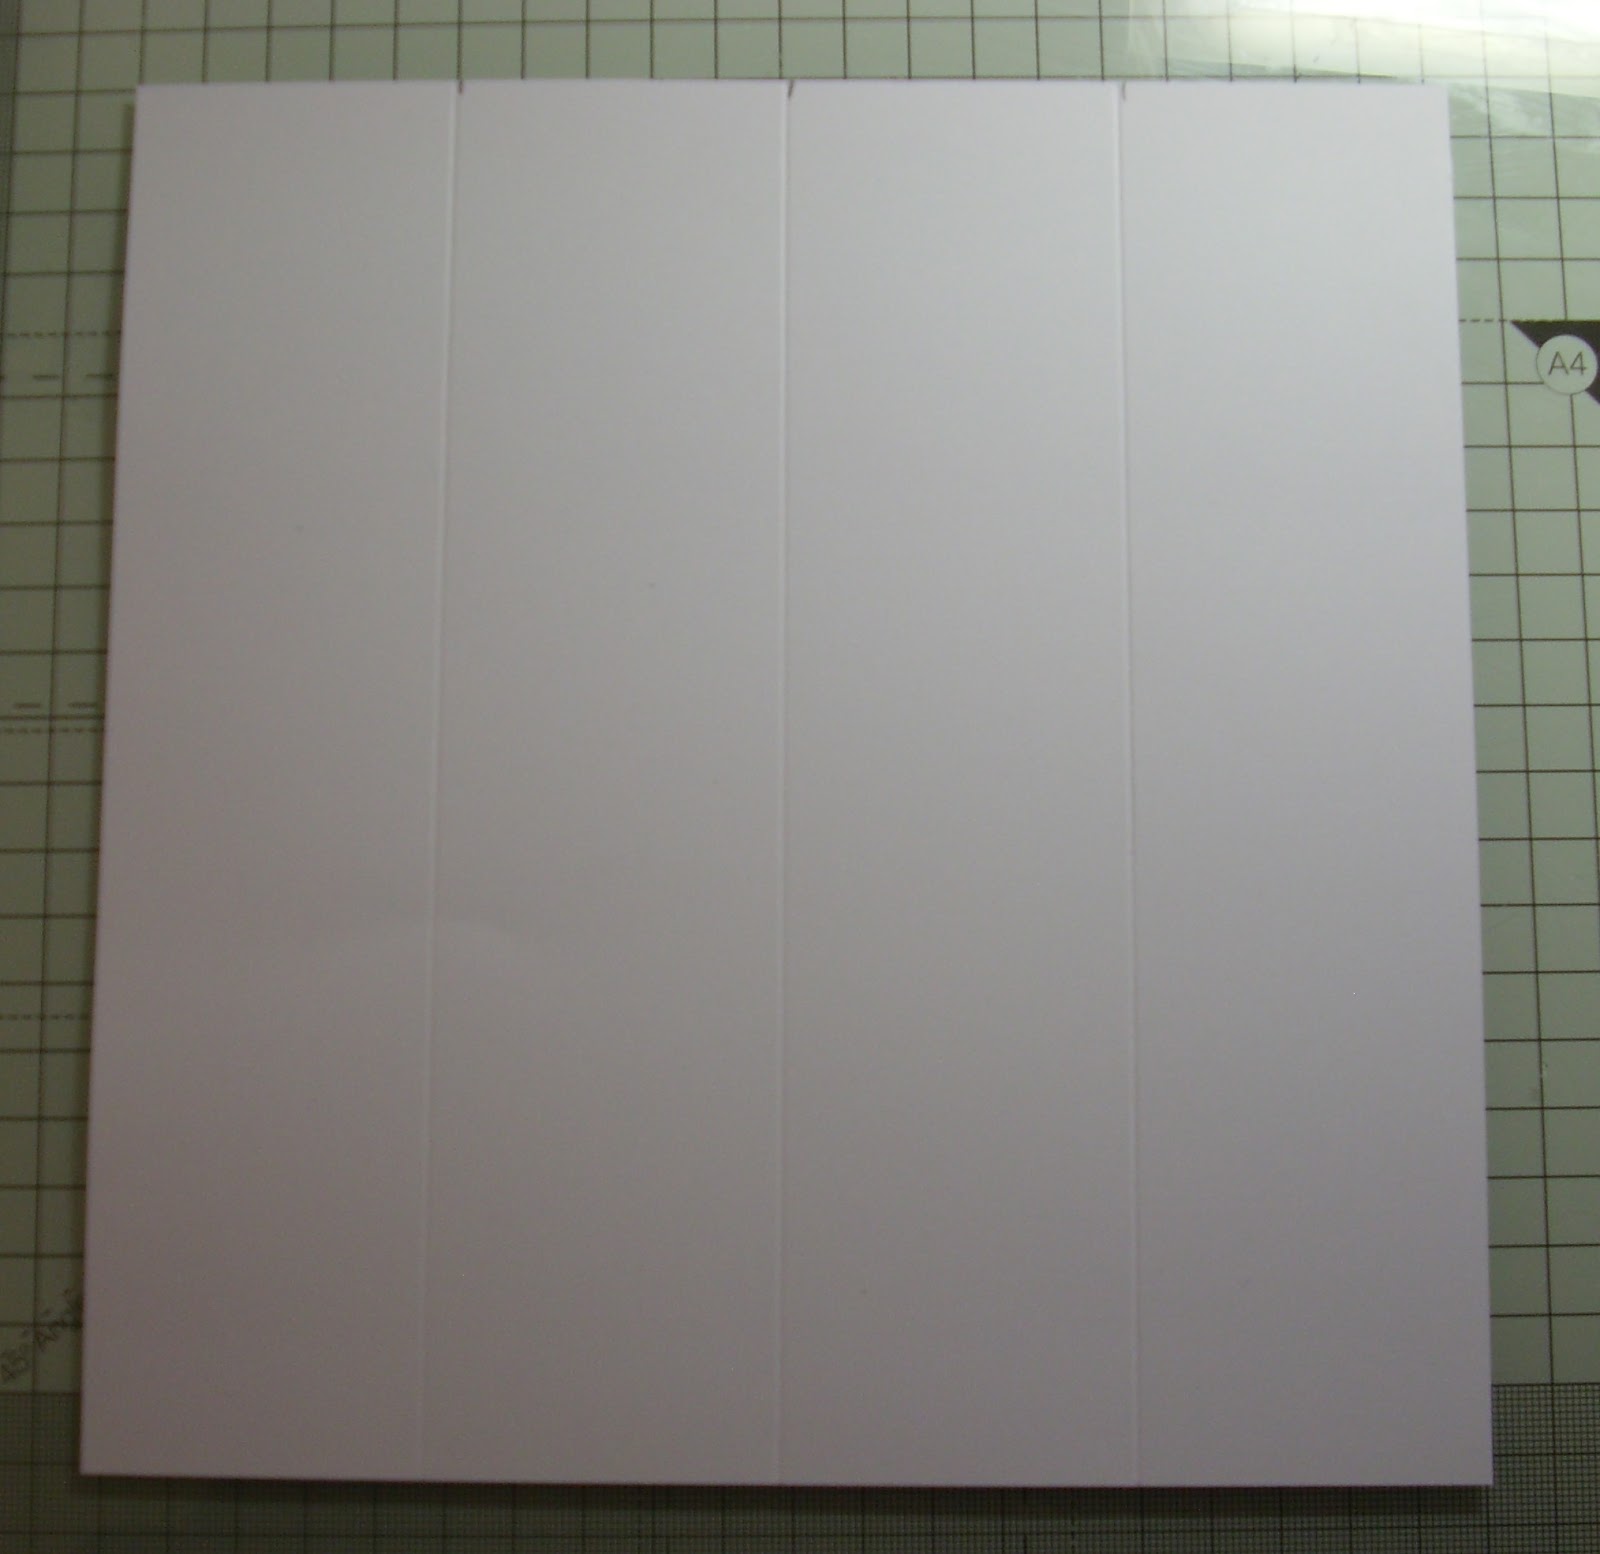
Fold all scores inward and strengthen folds with a bone folder.
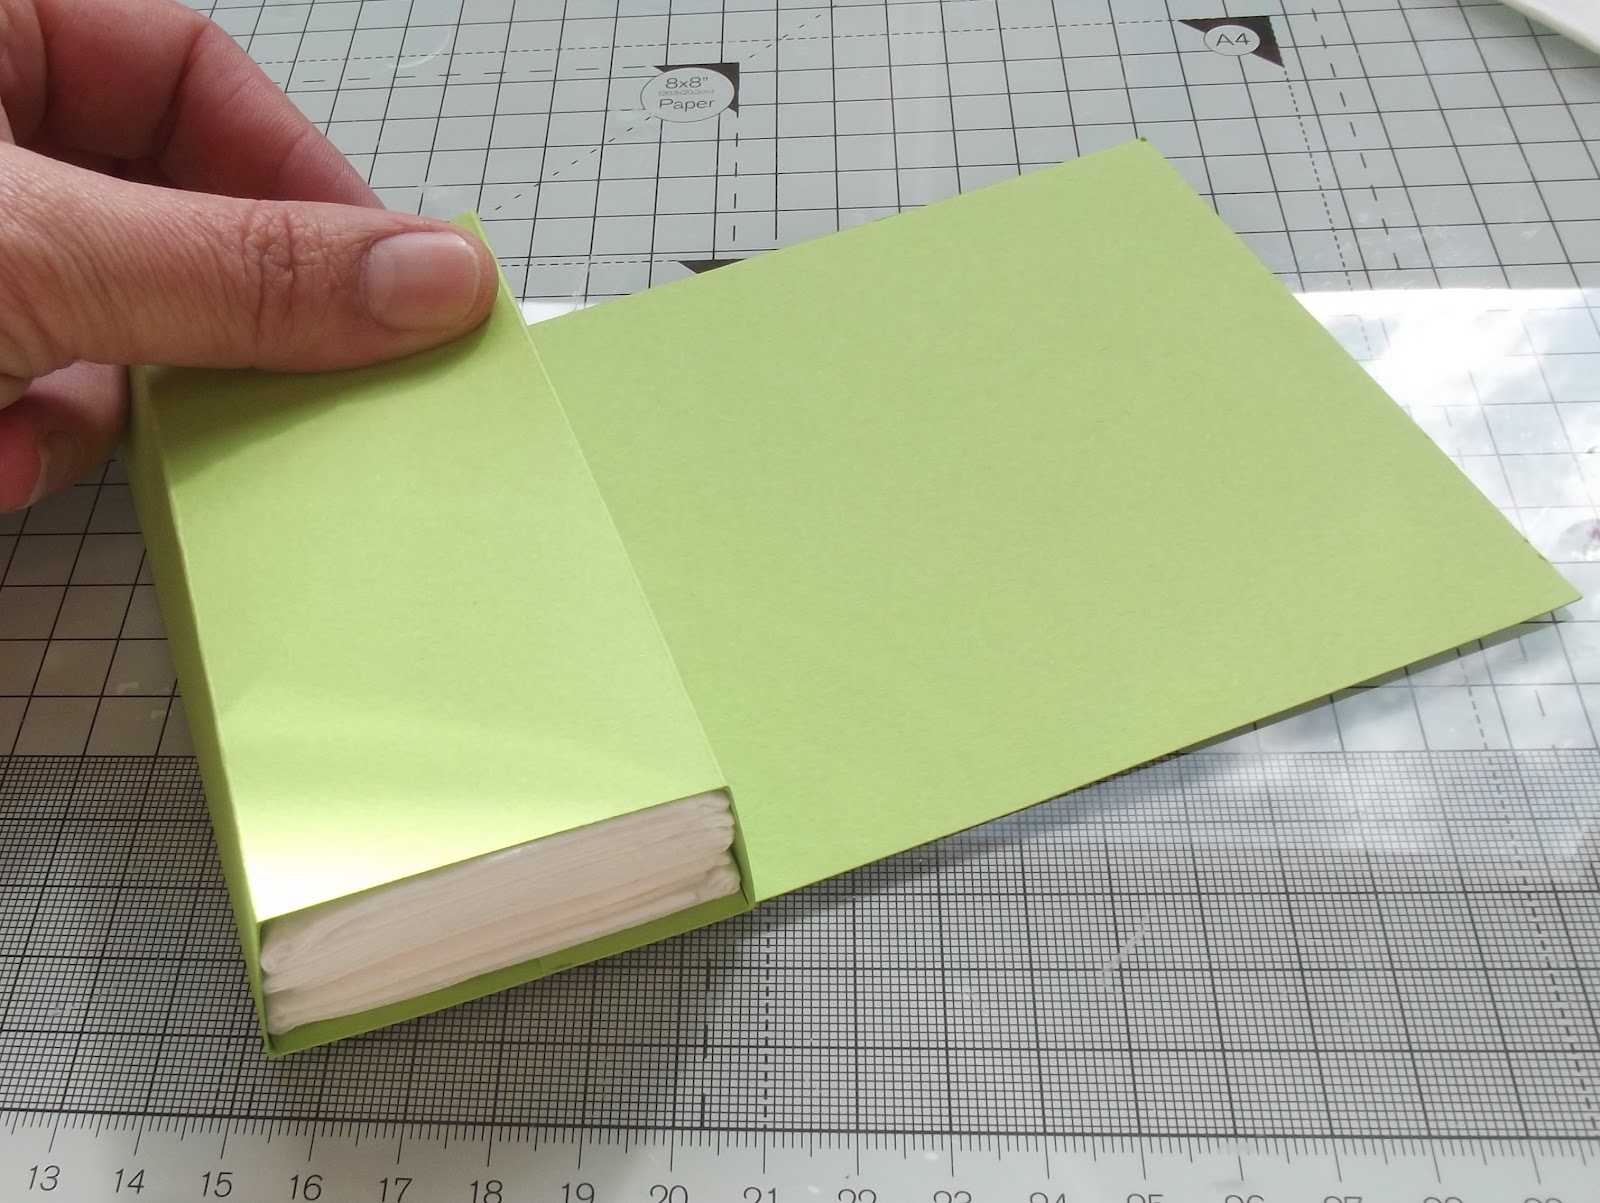
Now place your tissues inside just to check they fit. I have used anything from 4 to 6 tissues as it depends on the brand that you buy.
 

Once you are happy with the fit of the tissues decorate all the panels that will be seen in patterned paper.. When you have done this wrap your cardstock around the tissues again just to ensure you know where to cut the hole for the tissues (sounds basic, but its not very funny when the hole ends up at the bottom.....lol)

Cut the hole with  your Big Shot or draw a rectangle by hand on the back of the panel you are cutting into and cut this out with a craft knife.

Place double sided tape on the first two 1" panels. Place the tissues on your project and wrap the cardstock around them. (as shown in the image above minus the decoration) Join the panels together. 

Finish decoration and you are done.
Hope you give this little holder a try as its really fun and quick to make :)

Happy Crafting Everyone.

Wednesday, May 23, 2012

Jelly Baby Pocket Gift

Just a quick post today for a quick project.  I popped some Jelly Babies into a bag and basically wrapped some card around it. :)

I make all my basic folds with printer paper and when I am happy with the folds and the width of the card etc I just cut my card to size and mark and score those folds onto my good card. Double sided tape holds this bag in place. Some quick decoration and a sweet little gift.........................to myself........lol..... This pocket stays closed with magnets but a ribbon wrapped around would have the same effect.


Happy Crafting Everyone.

Monday, May 21, 2012

Lazy Front Panel Card Tutorial

Ok, so you are probably wondering about the title of this post but its not wrong. I was up late one night and I needed to do an impressive card for a demo. It was 2.30am and I was not allowing myself to go to bed until I had produced something. So I sat, and I thought and this came to me. The easiest, laziest way to make a front panel..........."wow that's a fab fold"..........card!!!! It takes less then 5 minutes to put together. Now that is one L....A....Z...Y... card.

Here we go.............easy peasy..........

All measurements are in Inches.

1. On the long edge of an A4 sheet of card make a mark at 2", 4", 6" and 8".
2. Cut off the section at the 8" mark
3. Put the section you just cut off to the side. You will need it soon.
4. On the larger section, score on the 2", 4" and 6" marks.
5. Fold these marks in a concertina style as shown below
6. Now take the smaller section you cut off and fold it in half. Make sure to get a nice crisp score mark with a bone folder.

7. This section now pops over your folded section.
8. To glue this in place you want to be sure that you don't put your glue or double sided tape too high up the piece of card. I place the folded piece level with the end of the card and make a pencil mark. This ensures I place glue no further then this mark. I actually place my patterned paper in the valley show above before I glue this top piece down as it is just plain awkward to do it afterwards!!!

9.Now decorate the card.

Here is one of my finished samples. This is one of the fairy images from the Enchanted Fairy range from DoCrafts. I was very manic with work and home when this range came out and I only had a week to get everything done for my demo. So one of the girls in my class colored in the image for me, isen't she beautiful. It was done with water color pencils. Carmel you are a coloring genius :)

Well I hope you give it a go. Its one of the quickest cards to put together, gives a great effect and leaves you time to spend on decorating.

Happy Crafting Everyone

Sunday, May 20, 2012

New York New York what a wonderful town!!!

I just thought I would pop up a quick demo card today. Black and White always works for me in fact it kinda rocks my world!!!! This is all stamped from the Urban Bookprint and the Boolfe Patchwork Background stamps from DoCrafts. Just a strip of black card behind the images finishes off the card. Yep..............love it!!!!!

Happy Crafting Everyone.

Saturday, May 19, 2012

Urban Sister Card


Well I had a fantastic demo today in Premier Arts and Crafts in Bray. Loads of new folds, tutorials and free coffee so a very busy happy day with loads of great customers and friends. Luckly its just a 8 minuite drive home so I was tucked up on the sofa with Hannah watching Glee by 5.30.......happy days.

Ok this card is very different from my usual style but kinda cool I think I took some brown card and folded it over into a square shape. I layered it with the Urban Papers from Docrafts. I sponged the paper in brown ink to age it slightly. I stamped the word Sister onto some of the excess paper and then cut it out, I stamped the "I" again. The full word was then stuck onto brown card and I cut closely around it. I did the same to the letter "I" and then decoupaged it up onto the word sister. The two buttons are from the Boofle button collection and are just layered together with a glue dot..


Hope you like it :)

Happy Crafting Everyone.

Friday, May 18, 2012

Boofle Birthday

Using the fab Boofle papers I took a piece of left over scrap from another project and cut it into equal sized strips (to make it stretch further!!!) Topped off with a bit of decoupage and a spare flower from another project and a great little card is born. I have to say this card was really popular at the demos as it was so simple and so pretty. 

Happy Crafting everyone......

Thursday, May 17, 2012

Best of Friends Heartwarmer

 
Day 2 of showing demo cards and I had to show you this cute tall card. Just a scrap of paper I had left over from another project, a heartwarmer sentiment, 2 layered Boolfe Flowers and  a Button make up this card. I have to say I love the simplicity of it. A few layers and a pretty little card emerges :)

Happy Crafting Everyone......

Wednesday, May 16, 2012

Layered Hearts

Sorry for the long delays between posts lately. I have been manic with work and classes and oh life. It seems next to impossible to grab anytime for myself lately. To top it all off my camera decided to sulk for the last couple of weeks and not take any photos, thankfully this seems to have fixed itself so I am hoping to get my head down and start getting some tutorials underway in the next 10 days or so and I will pop them up as soon as I complete them.

For the moment I'm am going to start posting some of my demo cards over the next few days for those of you who haven't seen them :)

This card is using the Daisy and Dandelion papers and the Heart Xcut Dies from Docrafts. Just some simple layering up of the hearts creates a simple but pretty card.


Happy Crafting Everyone :)

Monday, May 7, 2012

Create your own Background paper (1)

I adore this card. I was inspired by a card in "Papercraft" magazine in a section called "Color My World" and I fell in love with the idea. The paper is from the Boofle Paper Stack. I just took my craft knife and cut wavy lines along the paper so that I ended up with loads of strips of wavy card. I used 3 colors for this sample but I have also made cards with just loads of colors that I had left over from sheets of plain card that I had used for other projects (see second sample below).

Next I folded over a sheet of A4 card to make the A5 Card I was going to use as my base.

I then cut a piece of white card and cut it smaller then the A5 card so that it would sit nicely on the front of the card leaving a lovely white border around it. Cover this piece of card from top to bottom in Double sided tape. Removing the tapebacking and then lay the wavy paper pieces from the bottom upwards. I let the first piece hang over the bottom of the card and then continue to layer all the way up to the top of this card section. At this point the pieces fall over the sides of the card. This gives me the opportunity to play around with the lengths of wavy paper so that they all end up looking random and I get to choose the nicest cuts (waves) I have made. I just hold them above the card and move them from left to right and right to left until I like how it looks and then I place it on the double sided tape.

Once I have finished laying down all the pieces. I flip the piece of card over and cut off all the bits hanging over the edge so that it ends up as a nice straight edged piece. Pop 3D foam on the back and place onto your A5 card. Now just embellish with your greeting, decoupage etc.


Thursday, May 3, 2012

Missing You!

Ok, so you have to admit that this is the cutest image EVER.............. When I got my demo kit at the beginning of the last loop this was the first image I HAD to work with. I love love love it. I straight away though of my best friend Tara as she is living in Wexford and I miss her all the time. We talk on the phone and skype and I know she is always there if I need her but some days I just want to sit down just like this little chap and pretend she is just living next door and I can just go in for a chat :)

Hope you like it Taz.

Happy Crafting everyone :)