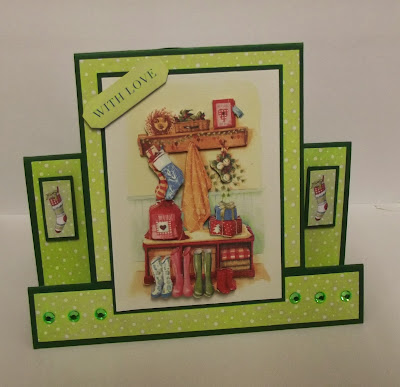
I have still been demoing throughout the Summer all over Ireland and I thought for my first post back after many months away I would show something close to my heart....................a lazy fold!!!
This is a front Panel card that many of you will have seen around the place but there tends to be a lot of measuring so I thought to myself - "how can I make this the ............LAZY way.
For those of you who saw it in my demos you will appreciate how quickly you can do this and for those of you who haven't just give it a try. I can make the card (minus decoration of course) in less then 1 minute - AWESOME :)
All you need is A4 card, a 12" ruler (any size), a light pencil and a craft knife. The ruler can be any size as the size of the ruler determines the size of the panels. Just pick the long ruler you normally work with and see what you produce. The size of the card can change depending on the size of card you want to make but to start off just go with using A4 size and play around with other sizes later.
So here it is:
THE VERY LAZY FRONT PANEL CARD TUTORIAL :)
Take an A4 piece of card and fold in half. Short side to short side.
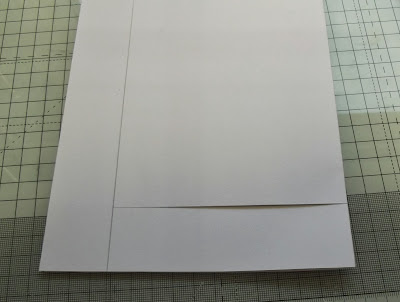
Place the bottom of the ruler to the bottom of the page (the open part not the fold. and draw a line across the page.
Now turn your card sideways and place the bottom of your ruler to the bottom of the card. (the drawn line will be on your left hand side) Now using a craft knife cut from the drawn line to the folded spine
This is how it will look when cut. Ensure you have cut through both pieces of the folded card.
Now turn your card so you are working on opposite side and do the same as before - place the bottom of your ruler to the bottom of the card and cut from the drawn line to the spine ensuring to cut through both pieces of the folded card. (the drawn line will be on your right hand side)
It will now look like this after you have cut it.
Turn the card again so the drawn line is close to you and place the bottom of your ruler to the bottom of the drawn line.
On the left and the right thin panels draw a line
It will look like this.
Score only the small lines on these 2 panels. Ignore the line in the middle panel. So you will score 2 small lines on the left thin panel and 2 on the right thin panel
Fold in a mountain for the panels marked M and in a Valley for the panels marked V. Do this on both the front and back of the card.
It will now look like this.
.
Rub out all your pencil marks and decorate.
Because you have used the width of your ruler you will find that all the panels (bar the middle back and front) are the same size making it much easier to just measure your ruler width and cut your strips all to the same width or smaller if you want to leave a boarder like I did and then all you have to do is work out the length of the panels your working on to get them ready to pop on the card.
FRONT
BACK
I hope you find this an easier and quicker way to make your front panel cards, I have to say I love it.
Happy Crafting :)


Great card, glad you back blogging.
ReplyDeletelove this one cliona.
ReplyDeleteLovely card, and nice clear photos showing how you did the base card.
ReplyDeleteFab card, looks like a great fold and love seeing the back too :)
ReplyDeleteGreat card, love the image. So good to see you back in blogland x
ReplyDeleteThanks for the tutorial - great card,
ReplyDeletexx
I love these style of cards and I love making them as well.. What a great card . Thanks for sharing with us at Crafty Bloggers Network
ReplyDeleteCrafty Hugs
Kelly - CBN DT XXX
I have never made this style of card....great tutorial.....I think I will give it a go.....Lovely made card xxxx
ReplyDeleteGood to see you back blogging Cliona, thanks for fab demos at A n H Mullingar in August! Ger
ReplyDeleteCrafty Bloggers Network
CBN DT
Welcome back woo! Great post to start back think i need to make this one hope to see you sunday at liffey valley
ReplyDeleteDaniel :)
Twitt Twooooo, missed you ;) Fab tutorial! I am like yourself, simplify anything that can be simplified, so I just luv this :) I will definitely be doing it this way from now on!!!
ReplyDeleteHi Cliona, just stopping by to say how delightful your blog is. Thanks so much for sharing. I have recently found your blog and am now following you, and will visit often. Please stop by my blog and perhaps you would like to follow me also. Have a wonderful day. Hugs, Chris
ReplyDeletehttp://chelencarter-retiredandlovingit.blogspot.ca/