Well I have just come back from a gorgeous birthday dinner for my beautiful niece Molly Comish who is turning 14 tomorrow. I can't believe how quickly she is growing up, both herself and Hannah looked so adult tonight that it took my breath away.
So, now that I am too full to move I thought it might be a good time and relevant to the evening I have just had to do a quick post with a couple of Birthday cards made from the Strictly Party Ultimate Pack from Docrafts. I adore this range as the papers, toppers and decoupage are beautiful and the cards just seem to flow out of me when I sit down to work with them. Anyone who comes to my demos knows that I rave about the Ultimate Packs in any of the ranges as they are just so stuffed with goodies that they have to, have to, have to...........be bought :)
I hope all had a good evening too.
Happy Crafting everyone :)
Sunday, September 30, 2012
Thursday, September 27, 2012
Be Fabulous :)
Well it feels like forever since I last blogged. I have been madly busy with classes, demos and workshops so it nice just to find a few minutes to sit down and upload a card :)
This is a topper from the Strictly Party range from DoCrafts. All I did was take a long piece of card, at one end I scored at 1" and then 2" and then I did the same on the other end of the card. These folds are scored into a mountain and a valley (see side picture below) The card is then folded in the middle. Just add a topper, a couple of greetings and some fab Shimmer Dome stickers. I love this fold as it uses up any long strips I have cut off other card and I can make it as high or as wide as I want to suit the topper I am working with.
Hope you like it.
Happy Crafting everyone :)
Tuesday, September 11, 2012
My Craft space old and new
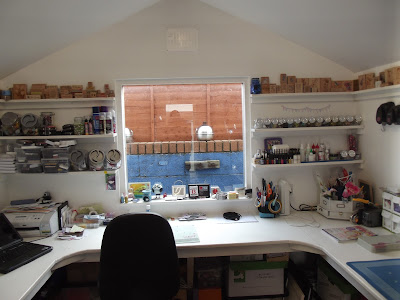
To celebrate being in my Studio for just over a year now I thought I would show you the before and after of my work space.
Can you believe this used to be how I worked. I live in a small 3 bedroom house and this insane mess was my Kitchen after about 3 or 4 years of crafting. My poor family didn't eat dinner at the table for over 2 years My hubby would come home from work and sit down at the little space at the table to have a cup of tea and relax after work. Dear lord how did we survive it all. To think I started this hobby with a few bits of paper, cards and some embellishments given to me by my friend Alma!!!! Before you look at the photos just try to imagine this as your home and you will understand what drove us to come up with an alternative area to craft in!
Now I have 10 x 20 foot studio that was built in my little back garden by my friend Colm and my husband Gary and finished off by my mom and sisters bringing in a crew of builders to finish it all off. Yes, my friends, hubby and family are pretty amazing people.
So this is how I Craft now :)
I have taken some photos to show you around the room. What I didn't photograph are all the boxes underneath my counter space as there are so many its just scares me!!!!! These 20 million boxes hold my extra embellishments, toppers, glitter glues, cards I have make, extra tools, workshop kits, kids workshop boxes, Christmas extras ohhhhhhhh and the list goes on!!!!!
Look to the left again and its the start of my work space. I love displaying my wooden stamps as when I get a creative slump I just sit back and look at them and eventually get inspired to make something. So it was really important to me that this little shelf was built all around the work space and I am so glad I got it as it just makes the room feel creative.
This is a better view of what I keep in this area. Mounted on the wall are magnetic tin holders. The long strip holding the tins comes from Ikea Kitchen section and the larger square magnetic tin holder is from Avoca Handweavers and was given to my as a Kris Kindle gift from my sisters partner Simon about 2 years ago (Simon you rock for giving me this - I love it). All these tins hold my fancy brads and eyelets (yep I have a lot of them!) Below these are my filing trays for recent paperwork, a little set of drawers that hold bits and pieces and the CD cases stacked up hold stamp sets. Beside the CD cases are my larger cutters for the Big Shot and a folder which holds Embossing folders.
Moving down the counter is the space where I lay out my demo kit products in groups, so I can see what I have to work on. In the corner I have my printer and laptop (I need noise to be able to work so I have movies playing all the time!)
What you are looking at now is where I do my main work I get great light from this window and I am surrounded by the things I like to play with.
These shelves on the left of the window mostly hold my inks. The smaller ones are in the large screw on lid Jars (Tesco's for €2.00). The bigger sized inks are in sweet boxes given to me by my local sweet shop and then there are random inks that have no set little home to sit in yet. The bottom three large jars hold greetings of all kinds and jars 2 and 3 hold flowers both purchased and hand made.
To the right of the window the top shelf has loads of little jars (Ikea) that hold my buttons and bows. The bottom shelf holds my re-inkers, smooch inks, smooch sprays, Dodlebug mini glitters, pearl drops, glitter glues, wet glues. Below these shelves I have my daylight light and turn table that holds tools and bits and pieces.
Next is the section that holds my most used punches, my boxes with card ideas to remember or use and another area to work on. Sometimes I will have embossing set up in one area and decoupage set up in another and then in my main area I work on what ever has caught my imagination at that moment!
This is the view from my chair looking down the studio and onto the back of my house. Tucked behind the card spinner is my ribbon reel holder which was made for my by my friend Colm. and I adore it (you'll see a picture of it in the old photos shown earlier)
Well that's it. I have to admit that every time I walk in the door of the Studio I take a huge breath and just smile. It really is my place of peace but I have to admit as much as I adore it there is a better feeling and that is just walking into my kitchen and being able to breath, sit down and realx :)
Saturday, September 8, 2012
Double Pocket Gift Fold Tutorial
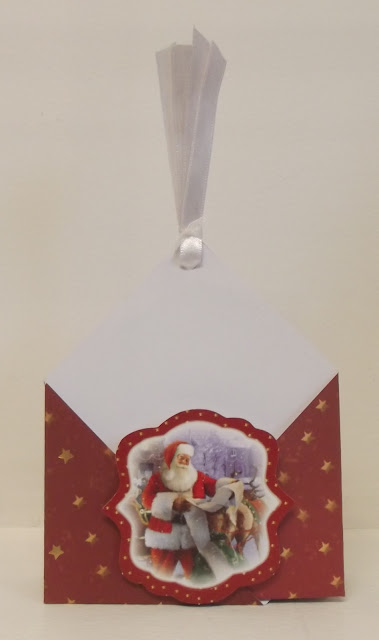
Hi everyone, well I have just come back from a fantastic demo in Dublin and I thought I would show you a little gift pocket holder that I showed in my last demo loop. This is great for Christmas or if you make it up in Birthday paper its a perfect little party gift for kids, just fill it with little packs of sweets.
Fold from corner to corner
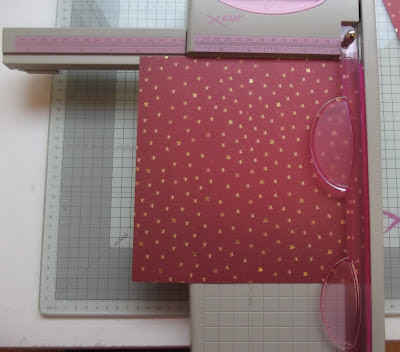
Make a mark with a pencil at 7/8” away from the fold of the Triangle on both the right and left side . Now score from mark to mark.. In other words the score line will run alongside the fold of the paper . (See the black line on the photo below).
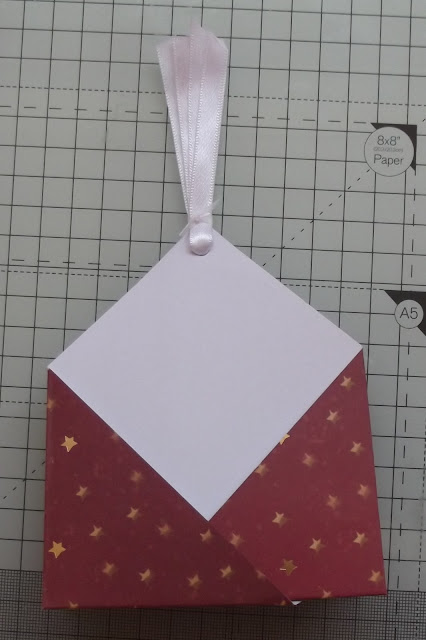
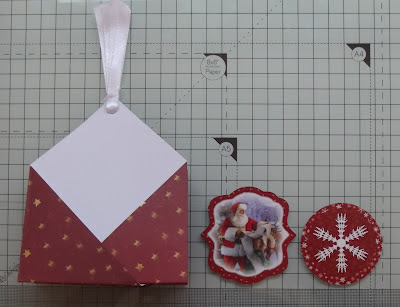
Pop a ribbon through the holes to hold them together. I tie them together with a smaller ribbon. Then put a 3D foam where the pockets meet and put an embellishment on top on each foam dot (one for the front and one for the back)
This makes gift card holder or just pop a packet of sweets in one pocket and you can make a mini card to fit in the other pocket.
Happy Crafting Everyone.
Right lets get going..................
Fold from corner to corner
Make a mark with a pencil at 7/8” away from the fold of the Triangle on both the right and left side . Now score from mark to mark.. In other words the score line will run alongside the fold of the paper . (See the black line on the photo below).
Now make a mark on the fold at 3 ¾ and 7 5/8. Score these marks downwards
Open up
your piece of paper and it should look like this picture below
Fold in the
left and right sides.
Flip the paper over and make the central line a
mountain fold and the two scores either side valley folds.
Bring the two top pieces together and you will have your two pockets.
Punch a hole in the top of both trianglesPop a ribbon through the holes to hold them together. I tie them together with a smaller ribbon. Then put a 3D foam where the pockets meet and put an embellishment on top on each foam dot (one for the front and one for the back)
This makes gift card holder or just pop a packet of sweets in one pocket and you can make a mini card to fit in the other pocket.
Happy Crafting Everyone.
Subscribe to:
Comments (Atom)


