,So I think it only fair that I you from the start that the paper is going to change throughout this tutorial. I found the photos I had taken a couple of years ago for a tutorial handout which I gave out at some of my demos and then my computer crashed and I lost half of my photos and this is what I have managed to rescue along with some more updated pictures!!! LOL. Well you would hate it if I just did a normal straightforward tutorial...........where would the fun be in that!!!!
Ok so this tutorial is about having a bit of a play. Have a couple of practices on printer paper to get into the grove of the folding. Every time I make this tie it looks a bit different and it all depends how much you fold back the paper. After you have given it a go a few times you will know yourself what look you like.
Lets get started:
You need a square piece of paper – any size so long as
it is square. For a tall card I use a square 5" x 5" and if its an A6 card I cut smaller.
Fold the paper from the tip of the corner down the
central line you have drawn (as in the photo). Then repeat this for the other
side
Now turn the paper to face you like the photo below.
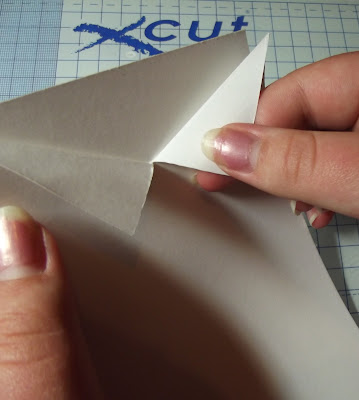
Take the tip and fold it back on itself . Take a guess as to how far you turn it back. Just eyeball the photo below and give it a bash!! Most times I aim for between the two side points .
Now take the tip and leaving about a 3/4" gap (around 2cm) fold the point back again (see below) This small section helps to form the knot in your tie.
This is how it will look from the front.
This is what it should look like from the back.
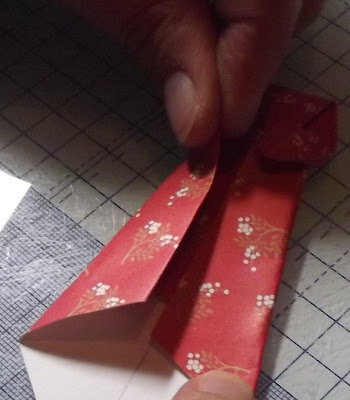
Now take the right side of the paper and fold it back along the center line.
Right now this really is the "give it a go part". Push tesection shown below down and outwards (it will be sticking up) You are trying to get a kind of squared off look. This really is just practice...........promise.
Now follow all the steps above and do the same to the left side of the paper
The back of the tie will now look like this (kinda......sorta.....lol)
This is what your completed tie will look like.
Now take your card and at the top make a mark at the center point. Draw a line about 3cm down from that mark. Now cut down this line with your craft knife. Rub out the pencil mark.
From the bottom of the cut to each top corner of the card score a line (see below)
Now fold these pieces back to create your shirt collar.
Curve these collar pieces with your fingers. Do this gently so as not to crease the card.
Place double sided tape on the back of your tie and stick it up to the end of the cut and snug under the collar.
Pierce a hole near the tip of each of the collar point sand place a brad
in. You could alternatively use gems. Next Place 3D foam under the
collar (I just use one circular foam pad under each side of the collar) and stick them down.
Now all you have to do it add a greeting.
Well I hope you give this a go. A little bit of practice and you end up with a fold you can haul out and use for any male card you are stuck on!!!!
Happy crafting everyone :)


Thank you for sharing. They are so clear to understand.
ReplyDeletei love it cliona
ReplyDeleteA great tutorial, thank you
ReplyDeleteCliona , Thank you so much for sharing , I love it xxxxx Made one now so thank you xxxxxxxxxxxxx
ReplyDeleteHi Cliona, such a fabulous tutorial, very clear and easy to follow - thank you
ReplyDeleteSue
Fab tutorial :-) Elaine-xxx-
ReplyDeleteWow love it so simple and thanks for the tutorial xx nicky x
ReplyDeleteGreat tutorial tfs xx
ReplyDeleteGreat tutorial Cliona. Thanks and as usual very clear and precise instructions. Regards Norah
ReplyDeleteoh my goodness what super tutorial thank you so much ... you made it look soo easy lol ... I don't have any mens cards to make at the moment but will certainly bookmark this page ... thank you again ... happy crafting and love sandy xx
ReplyDeleteThat's a great card, men's cards can be so boring. Great very clear tutorial too ;/)
ReplyDeleteWhat a fabulous project and super tutorial for FD. TFS I have seen tutorial and made a card with tie and waist coat. xx
ReplyDeleteGreat tutorial - thanks
ReplyDeleteKate
xx
Really fab card and a great tutorial
ReplyDeleteLindsay xx
Hey,
ReplyDeletethis is what i needed, i know how to make origami shirt, but didnt know how to make the tie...thanks so much for sharing the tutorial....
Thanks Cliona!
ReplyDeletebrilliant catd
ReplyDelete