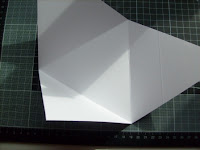
Well the new Do Crafts kit has arrived and its is going to be a busy 9 days ahead as I get ready for my first demo of November at Inspiring Ideas in Blanchardstown. So being the busy little thing that I am, I thought I would just post a cute, quick and simple card.
I love a card that just falls together. With this card it started as an A6 card, I cut 4 equal sized corners off the card and added some Paper, Forever Friends decoupage, a greeting and a few gems.Viola, done and dusted.
Have a great evening :)
Thursday, October 27, 2011
Wednesday, October 19, 2011
6 Panel Fold Card Tutorial
Well what a week. I had the trauma of loosing my internet for over a week. To be honest I didn't quite know what to do with myself!!! I am so used to sitting on line and searching out ideas, playing on Facebook and checking my emails that when all those facilities were gone I had to actually .............wait for it..........clean the house.............Aghhhhhhhh, so wrong!! Lol..
This is a card fold I have seen all over the internet in lots of different sizes. I settled on the size below because I like the fact that it fits nicely into your hand when closed but by the time you have opened it completely you have to hold it in both hands. Ah, its the little things that make me happy (well the little things and Coffee!!)
Right so here we go...............
All measurements are in Inchs.
You need 3 pieces of card stock:
(Largest piece)
Cut cardstock to 3½" x10 ½"
Score at 3½" and 7"
Middle piece)
Cut cardstock to 3¼" x 7¾"
Score at 2" and 5 ¼"
On the back of the central panel place double sided tape for later.
(Smallest piece)
Cut cardstock to 2½" x 7"
Score at 2" and 5"
On the back of the central panel place double sided tape for later.On the left hand side panel of your largest piece (3½" x10 ½") make a diagonal cut from the top left corner to the bottom right corner. Do the same on the right hand side panel. (see photo). You don’t need these cut off sections so put them aside.
Now that all your pieces are cut you are ready to put them all together. Take your smallest cardstock piece (2½" x 7") close up the folds and remove the double sided tape from the back of the center panel.
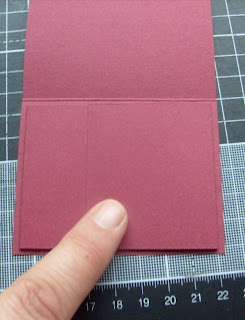
Have your middle piece (3¼" x 7¾") facing you long ways with the largest bottom panel closest to you. Place the (2½" x 7") on this bottom section, you will end up with a little boarder all around it.
Close up all your folds again and take these joined pieces and remove the double sided tape from the back of the central panel and now place this in the centre section of your largest panel.
Yes, these last few photos are blue, I took all the photos and then realized that I missed out this section and had to re-photograph and you guessed it none of the previous color to be found!!!!
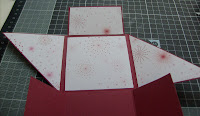
Your card will now look like this n when opened up. (yep, back to red!!)
Your card is now ready to decorate.
I am changing to centimeters here for measuring the patterned paper as it is easier while working with my guillotine.
Cut 2 squares 85cm x 85cm and cut them in half diagonally and place them on the back and front of the diagonal flaps on your card.
Just measure each panel and cut patterned paper to fit. (some of the process is shown here)
Keep going until all the panels are decorated and then embellish to your hearts content. :)
Once you have completed your embellishing its time to make your Belly Band, always embellish first as your card will increase in thickness (sounds a bit like my waistline!) and you want to get your belly band just right.
(These photos are from before I decorated as I realized afterwards its better to embellish first.)
BELLY BAND.
Cut a piece of card to 1 ½ x 8 ½
Hold it to the front of your card and then gently wrap it around the card. Do not make it too tight as you want to be able to slip the card out to open it. Using double sided tape (strong) join the band at the back (cut off any excess you don't need at the back).
Decorate your belly band and you are finished.
To make the little silver embellishments I embossed silver card with the Do Crafts Winter Wonderland Embossing Folder (Snowflurry) and then I used the XCut Nesting Dies Spiro Circles to cut out one of the snowflakes.
I hope you like it and have fun making it. :)
Sunday, October 9, 2011
Star Card Tutorial
Ok its after 9pm here, X Factor is over (my guilty pleasure), Hannah is in bed, Gary tucked up on the couch watching football and your should all be ready to do some cardmaking!!
I had hoped to get this tutorial up on line yesterday but after a fantastic demo in Carlow I came home and was in bed by 8.30pm...........such a sad situation, I was wrecked (LOL). Well I am back on form today so here comes the Star Card Tutorial. I saw a sample of this card on line and searched for hours to find out how to make it. Finally many many cups of coffee later I FOUND IT!!! Yipee.............. Then I LOST IT.......grrrrrrrrr. I can't find it in my computer history and I really really wanted to give credit to the creator of this card because they are just genius to have worked this out. I salute you mystery Star Card creator :)
I have done my own tutorial for it in the meantime because it is just such a fab card and if you follow the measurements and pictures you will be shocked at how easy it is. I have made the cards that are shown here as Christmas Cards but to be honest I think this would be excellent as a Birthday card, passed your exams card etc etc.....the list goes on. Fantastic.
(all measurements are in cm)
Trim a piece of 12 x 12 cardstock to 30cm X 30cm
Make a mark on the top of the page at 15cm and from this mark draw a line part way down the middle of the page This is just a guide line and I like to work off it. Do this the first time you make the card as its easy just to follow what I do here and when you make your next one you can do what works best for you.
Working with your ruler from your top mark make a mark 4cm down this central line. From this 4cm mark draw a line to the bottom left hand corner and then draw a line from the 4cm mark to the bottom right hand corner. You will have drawn a Triangle.
Now cut out the Triangle you have drawn. When you cut out the triangle make sure you cut all of the pencil marks off, this helps further on in the card when you are tucking it all together as it will fit a lot neater. You can erase your central guide line now if you like as it has served its purpose :) You can see in my picture I am lazy and did it later!!
Put your ruler up against the bottom of the triangle, it is 30cm long (as are the other 2 sides). Mark 15cm (the center) on each side of your Triangle
.
Draw a line from each mark to the next as shown and you will end up with a second triangle inside the first.Working from your inner triangle points, Place your ruler with the point of the triangle at the 15cm ruler line and make a mark 5cm either side of this ( 10cm and 20cm) . Do this from all three inner triangle points.
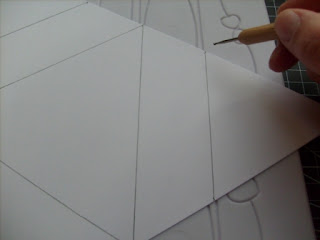
Draw a line between these marks as shown in the photos.
Score all 6 lines that you have drawn.
Rub out your pencil marks now.
Fold all the inside lines inwards and all the outer folds backwards.
Tuck the folds into one another as shown and then use a bone folder to strengthen the folds. After a bit of playing around with this (and after I took the photos!) I found an easier way for me to fold the card together, so here it goes....When I fold the card I think of it like this. I have the card facing me with a panel on the left a panel at the top and a panel at the right. Working from my left panel it goes down first, then next goes down over it and then the third and final panel goes down over that. Then I tuck the the crossed over panel at the bottom. Grab the bottom left point (it will be tucked under the right point gently pull it up and tuck the right point under it. (Under, over over tuck.). This will put you into a bit of a panic the first time but you will get a lot better at it and you will soon realize that the card wont rip. Yep the photos show me doing it starting from the right and I did tuck it this way for this card but as I am know to say........".do what I say not what I do" (or sometimes photograph!!!!)
Now to start the decoration.
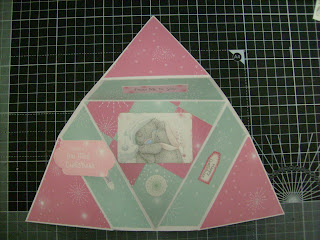
Cut 6 strips of patterned paper to 15cm x 4cm. You will end up playing around with this measurement yourself to get the look you want.Place one of these up against one of the bands on the card, draw the edges and cut these off.
After you have cut your 6 pieces make a mark 1cm in from the top and bottom right hand corner and cut this section off. These pieces should now fit in neatly to the bands on the card with a nice boarder. If you like a slightly smaller boarder just cut 1/2cm off the bands.
When I first made the card I made templates of all pieces that I needed, you always have to have a bit of a play with these pieces and when you get it right and you are happy that they fit well then those pieces become your templates and it takes all the measuring hassle out of making the card in future.
Draw around the triangle at the tip of your card onto the back of your patterned paper as shown. When you cut, cut inside the lines as you want this triangle to fit in neatly or with a small boarder, I always find I have to have a bit of a play with this until I am happy. Once you have it the size you want. Copy this onto the back of your patterned paper another 5 times and cut these out also.

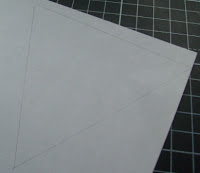
Now measure your center triangle of the card, I place the star on the back of my paper and holding the points up or folding them into the center I just draw around the base triangle and cut it out. Now cut it down slightly to get it to fit nicely into the center of the card leaving a small boarder.
For my center of this card I cut out a triangle of light white card and used the spare paper pieces left over from cutting my other triangles etc, I cut them square and covered the white triangle with glue stick, then I patch-worked these pieces onto the triangle piece I had cut. Flipped it over and cut off the excess. No waste..........happy days.
Now start attaching all your pieces. I use double sided tape to do this as this is a real pull at card and I want to ensure everything stays on solidly.
Tuck star back into place again and ensure all fits nicely. Now open up again and decorate with embellishments,
Done and dusted. Give yourself a pat on the back......you know you deserve it. :).
Well its off to the shops for me. I have yet to buy food for the week! When I come back I expect you all to have made your cards. hehehe.........
Subscribe to:
Posts (Atom)


