Right here we go...
All measurements are in inches
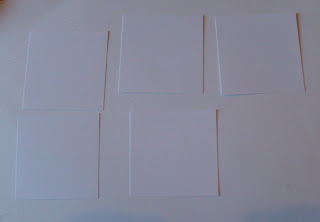
Cut 5 pieces of card to 3" x 3"
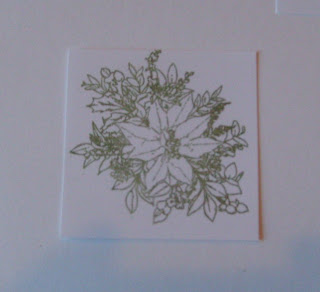
On both the back and the front of these 5 pieces stamp your image. I have used the poinsettia from Papermania "At Christmas Time" stamp set. Any stamp with good fine detail will work really well.
Sponge each piece on the back and front .(See A6 Calender Tutorial for sponging tips.)
Ink around the edges by running your pieces along your ink pads. This will give a nice definition to the edges.
Now for the folds. Work on one square at a time. All the folds are the same for each square.
Fold the square from edge to edge.
Open up and fold edge to edge in the opposite direction you will end up with a cross on the square.
Place your piece of card on the table and flip it over (turn over and work on the other side) you are now to fold from corner to corner. This fold is very important for making the square pop into position.Open up your fold and put your finger underneath at the center and push to pop it upwards. Your square should now look like this. Push in the right and left squares with the creases in them together (pointing downwards. Push them towards each other until a full square forms.
Your square should now look like this.
Do this to all five squares.
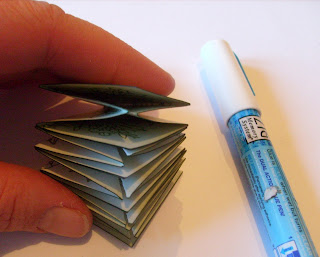
Now see the way they open up. You are to join all of these togeather with the open section all facing the same way when joining them. (see photos).
Cut two pieces of card 1½” x 1½”. These are your covers for the ornament.
Decorate these covers. I stamped mine and sponged them to match the inside panels.
Close up your ornament and place some double sided tape from the back corner to the open corner, remove backing tape and lay a long piece of ribbon over this. Do this on both sides of the ornament.
Place your decorated cover over the ribbon. Make sure you think about what way the ornament will hang when unopened as you don't want the words going off at a dodgy angle!!!
Now you are ready to attach the bead. We have a fantastic beading shop in Bray town called BDI and they have an amazing variety of beads and findings and of course the most important thing.... a fantastic Coffee Shop :). This silver bead is my absolute favorite for this ornament it just adds a touch of class to it. I make my ribbon a lot longer than I need it so I can cut it to a sharp point to get it through the width of the bead. Push the bead all the way down the ribbon to the top of the ornament.Tie a knot at the top of the ribbon and cut it neatly to tidy it up. If you find your ribbon is fraying at the top you can VERY CAREFULLY run a flame along it and it will seal the ribbon to stop it fraying. You need to be quick doing this as you don't want to bun the ribbon or yourself. Another solution is to use clear nail polish but to be honest a lot of times I find this soaks down slightly into the ribbon and ruins the look of the project.
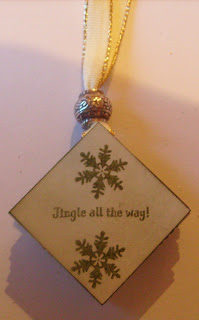
Your Ornament is done. Here it is closed.
To open it, slide the bead up the ribbon to the knot at the top. Turn the ornament inside out (bring both covers around to meet one another). Slide the bead back down. Your ornament is now open for display.
Below are a couple of other options. You can make this ornament with any shape that will fold exactly edge to edge in all directions for example circles and you can make it any size you want so long as it is the exact same size for all five pieces of card.
This shape is cut from the Xcut Four Petal Nesting Dies.
You can use any colors. The one below is inked in black using an "Ink it Up! dye based ink.
You can use any stamp you want I like to use fine detail stamps. The stamp used below is the Enchanted Christmas Holly Fairy from Docrafts.
I hope you all enjoy making this cute little thing.
Happy Crafting everyone.


That is beautiful! And thank you for the fantastic tutorial.
ReplyDeleteoh my goodness how super ... thank you so much for taking the time to show us how to do it ... you make it look soooo easy ... happy crafting and love sandy xx
ReplyDeleteCliona, this is beautiful and I might make them to put on pressies as tags.
ReplyDeleteThis is amazing. I,m going to have to try this. xxx
ReplyDeleteThanks for the tutorial Cliona, it is beautiful! I am bookmarking it to make one for next Christmas.
ReplyDeleteHi Cliona, I thought you might like to know. I've pinned your christmas decoration in Pinterest (a virtual pinboard) about an hour ago, and so far 6 people have added to their board. Never got so much feedback so quickly!
ReplyDeleteI just love this & keep coming back to it every time I'm on your blog!! Is it easy enough to do? I'm relatively new to crafting & was thinking about making 1 but don't know lol. Thank you for sharing x
ReplyDeleteThanks for all your really nice comments girls. Helen you have to give this a try, honestly just follow the photos step by step and you can't go wrong. You should be able to make anything on the blog it just might take a little longer as you are new to crafting. The more you attempt the more confident you will get + the more fun you will have :)
ReplyDeleteI love this ornament. I am going to make some for my family and friends.
ReplyDelete